Showing posts with label gluten free. Show all posts

Sunday, November 24, 2013

Spinach and White Bean Lasagna with Pumpkin Cashew Cream (Vegan, Soy and Gluten Free)


I made a glorious discovery this weekend with the creation of this equally glorious lasagna: cashew cream. It's something I've read about but put in the "I'm not treehugger enough box" along with turning off the shower when I shave my legs and making my own organic yogurt.  But cashew cream, as it turns out, is super easy!  Literally throw some cashews and a water in a blender and let 'er fly.  5 minutes later there's this wondrous, slightly sweet substance that acts suspiciously like flour, butter, and dairy-laden bechamel in this lasagna worthy of the Thanksgiving table.  

Wondrous stuff...it is actually creamy and slightly sweet
This is with the pumpkin added in as well..thick enough to stand up a spoon!
I love serving this at events where folks are low-FODMAP (just leave out the beans, garlic, and onions), vegan, gluten-free, soy-free, or all of the above. It's nice to actually be able to eat at a party or holiday event! Even if you have no dietary restrictions at all, this lasagna is the bomb and perfect for chilly weather. It also holds up extremely well wrapped up in the fridge, baked or unbaked, so you can make it ahead of time and save it for a busy weeknight.


Spinach and White Bean Lasagna with Pumpkin Cashew Cream 
(Vegan and Soy and Gluten Free)

For the Cashew Cream:

  • 3/4 cup raw, unsalted cashews
  • 1 1/2 cups water
  • 1/4 teaspoon nutmeg
  • 1/2 teaspoon salt
  • 1/4 teaspoon pepper
  • 2 cloves garlic, minced
  • 1 15-ounce can pumpkin puree
For the Spinach filling:
  • 1 tablespoon olive oil
  • 1/2 onion, chopped fine
  • 1 carrot, chopped fine
  • 2 cloves garlic, minced
  • 1/2 teaspoon salt
  • 1/4 teaspoon pepper
  • 1 10-ounce box frozen spinach (defrosted or not, won't matter because you'll cook it in the pan)
  • 1 can cannellini beans or other small white beans
For assembly:
  • 1 box gluten-free lasagna noodles (I ordered mine online; I haven't been able to find gluten free lasagna noodles in stores)
    • Note: if using gluten-free lasagna noodles, there is no need to cook the noodles ahead of time, they will soften fine in the oven. If using regular or whole wheat lasagna noodles, cook the whole box for 1-2 minutes less than the box says before assembling the lasagna.


1. Preheat the oven to 350 degrees.
2. Put cashews and water in food processor or blender.
3. Blend on high for 3-5 minutes, until smooth, thick, and creamy.
4. Scrape down the sides of the blender or food processor to blend well
5. Add the minced garlic, nutmeg, and black pepper and pulse to blend.
6. Add the pumpkin and process until fully blended.


7. Meanwhile,  heat the olive oil in a nonstick skillet until shimmering. Add the chopped onion and carrot and cook over medium-low heat until the onion is translucent.
8. Add the salt, pepper, and minced garlic and cook until the garlic is fragrant, about 30 seconds more.
9. Remove from heat. 


10. Spray a 2 quart casserole dish with nonstick cooking spray. Lay 3 lasagna noodles, slightly overlapping, in the bottom of the casserole dish. 
11. Cover the lasagna noodles with half of the spinach mixture.
12. Cover the spinach mixture with one-third of the pumpkin cashew cream mixture in an even layer.

I got a notion to add some dried sage at this point. So I did.
13. Add another layer of lasagna noodles, spinach mixture, and one-third of the pumpkin cashew cream sauce.
14. Add a final layer of lasagna noodles.
15. Cover the lasagna noodles completely with a layer of the pumpkin cashew cream sauce. You want to make sure the noodles are completely covered or they won't cook sufficiently in the oven.

Ready for the oven!

16. Cover tightly with a double layer of aluminum foil (the steam produced by the rest of the lasagna in the oven is what cooks the lasagna noodles!)
17. Bake covered for 45-50 minutes, until piping hot and wonderfully fragrant.


That's a mighty good-lookin' lasagna.


Sunday, June 23, 2013

Make-Ahead Gluten Free Layered Burrito Casserole for Two


There's so much to love about this casserole, most of which I tried to cram into the title. This was born out of pantry ingredients and a good dose of laziness-I knew I had all the ingredients on hand for taco night but I know myself well enough to know I often lack the motivation to undertake even that minimal amount of cooking on a weeknight. I love the convenience of making at least a few of the week's meals ahead of time and this is a perfect meal to cook on a Sunday and have for dinner during the week--it keeps in the fridge for a few days and the corn tortillas didn't get soggy as I expected. This is actually quick enough it's feasible to make in the morning before you leave for work and have the comfort of knowing dinner is ready and waiting for you at the end of the day. (Insider tip: as tempting as it is to play Superwoman, don't try this method the same day you get up early to work out/do the bills/finish that report. That's a good way to end up late for work and forget to turn the stove off and have to go back home to turn the stove off, of course making you even more late for work. Just saying.)

This serves 2-4, depending on your appetite, so it's not quite as daunting to finish as a 9x13 casserole dish if there's only one or two of you in the house. This will last you a couple of dinners or dinner and lunch the next day. (Leftovers-for-lunch day is actually a good day to work out/pay the bills/finish your report in the morning, by the way, because who doesn't love playing Superwoman every once in awhile?)
  

Make-Ahead Gluten Free Layered Burrito Casserole for Two
  • 1 16-oz jar salsa (I like Newman's Own)
  • 6-8 corn tortillas
  • 1 can black beans, rinsed and drain
  • 1 can diced tomatoes or diced tomatoes with chilies, drained
  • 1 packet pre-cooked whole grain southwestern rice blend (I used Seeds of Change, which is delicious) If you don't have these on hand, just sub in 2 cups cooked brown rice)
  • 1 8-oz. bag shredded Mexican blend or cheddar cheese
  • 8 oz. boneless, skinless chicken breast (2 regular-sized BSCB)
  • 1 tablespoon taco seasoning from a packet or 1 tablespoon chili powder seasoning blend (I use Penzey's Chili 3000 and love it)
That's it! This is so much more than the sum of its parts. Let's get started:

1. Coat a medium skillet with 1 or 2 tablespoons of olive oil and heat over medium heat until the oil is shimmering. Cut the chicken into chunks or bits, depending on your preference, just keep them about the same size. Let the chicken cook without moving for two minutes, shake the skillet up and let the chicken cook again for 2 minutes without stirring (as Anne Burrell likes to say, "brown food tastes good!") When the chicken is almost done cooking, stir in the seasoning mix and stir to combine. Remove the chicken from the skillet and set aside.
2. Stir in the can of rinsed black beans and the can of drained tomatoes. Taste a bit of the mixture and add a bit more seasoning if desired.

Whew! That was a lot of cooking.  Ok, now it's ready to put the rest together!

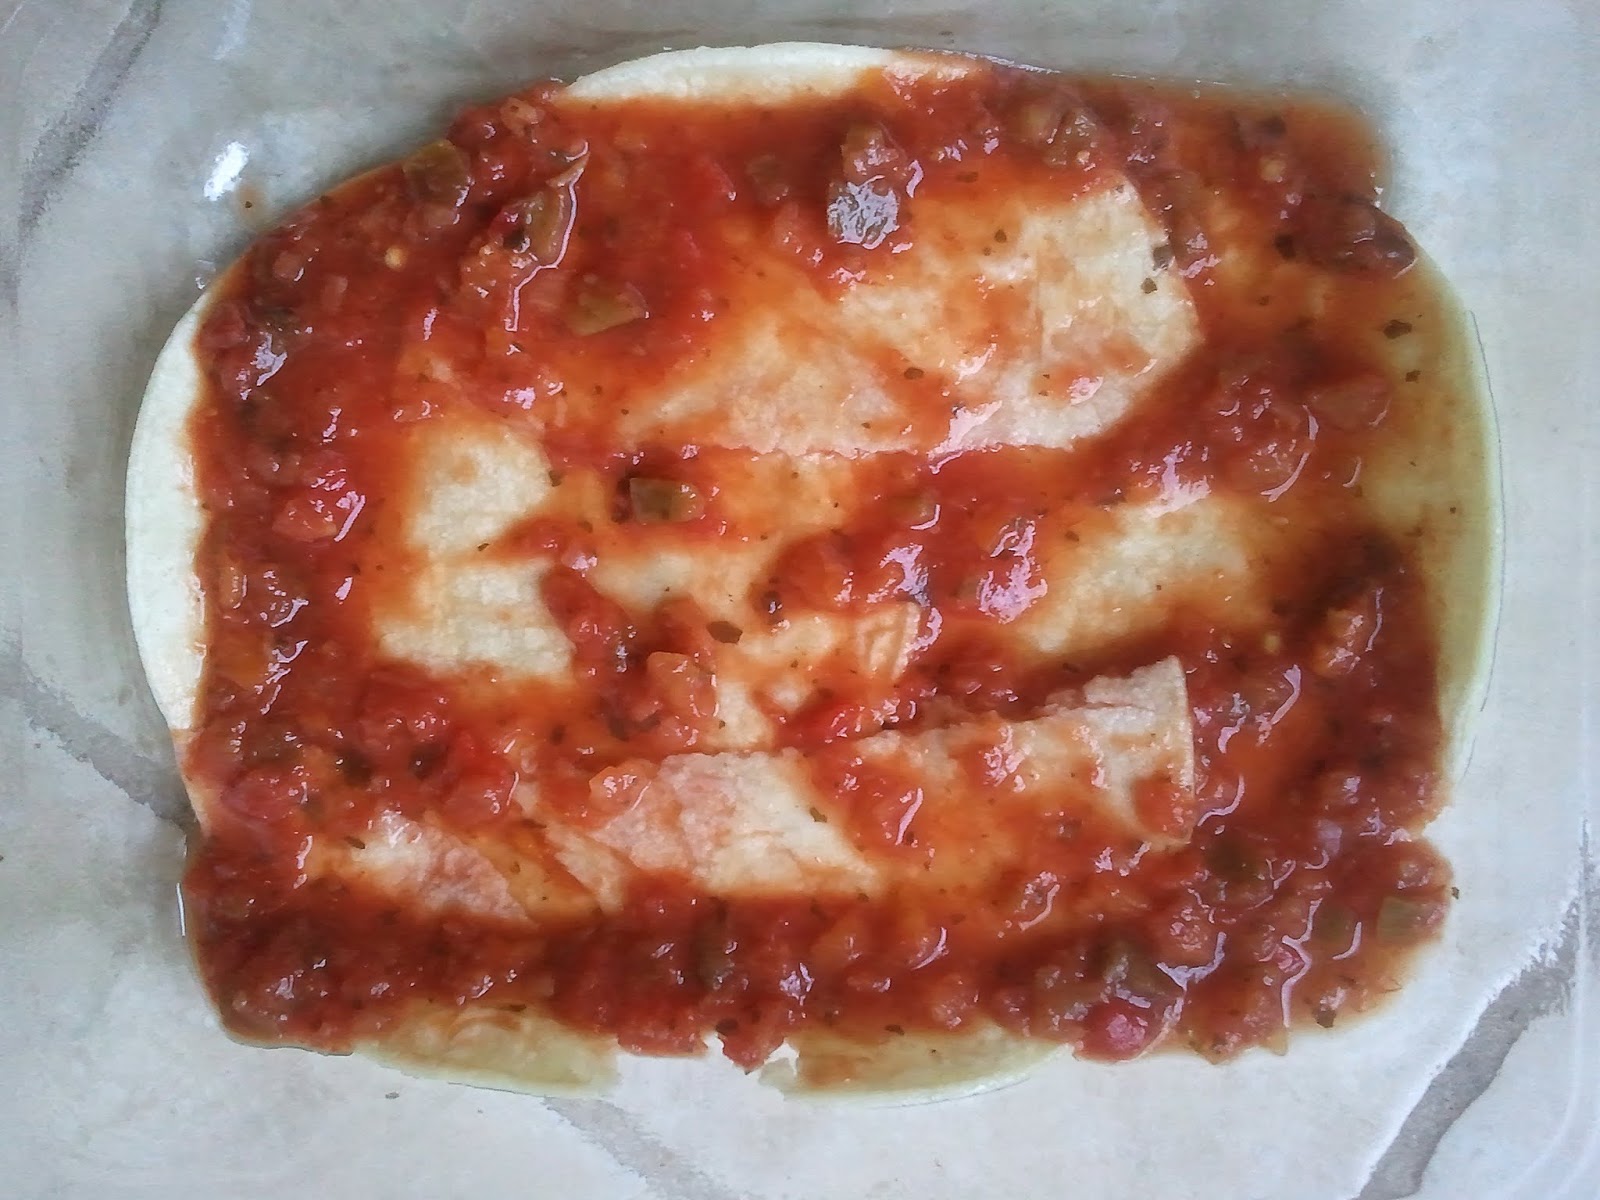
3. Put a thin coating of salsa on the bottom of a 2-quart casserole dish. Cover with a single layer of corn tortillas by breaking up some of the tortillas to evenly cover the bottom of the dish. 


4. Top the tortillas with another thin layer of salsa.


5.Break up the rice packet and sprinkle 1/3 of the rice packet over the tortillas. 


4. Top with 1/3 of the chicken and bean mixture, then sprinkle with a thin layer of cheese.


5. Repeat this layering process, starting with the corn tortillas and ending with the cheese-covered chicken and bean mixture.

6. Create on final layer of salsa-rice-chicken and beans, but this time skip the top layer of cheese.

7. You can either bake the casserole immediately or cover the whole think with plastic wrap and stick it in the fridge for up to 3 days.

8. When you're ready to bake, cover the dish tightly with aluminum foil and preheat the oven to 350 degrees.  Bake for 15 minutes if at room temperature or 20 minutes if straight from the fridge (if you are making this ahead of time, it will cook a bit more evenly if you take it out of the fridge and let it sit on the counter for 15 minutes or so, but then again it doesn't make a whole lot of difference).

9. Take the casserole out of the oven and crank the temperature up to 400.  Sprinkle the casserole with a final layer of cheese and bake an additional 15 minutes until lovely and browned and bubbly.


Yum. This is just as delicious with a cold lager as it is the next morning with a fried egg on top and good black coffee. Leftovers for breakfast are where it's at.

Enjoy!


Saturday, May 18, 2013

One Potato, Two Potato Salad with Garlic-Dijon Aioli


I haven't posted in about six weeks, mostly because for the last six weeks the hubby and I have been trying low FODMAP for a happy tummy, which involves cooking gluten and dairy free, among other things. I've been floundering a bit mealwise; we still don't have an easy and convenient standby with the "safe" foods my husband can eat so every day is a bit of an experiment. I'm slowly discovering another world of marvelous gluten-free blogs that inspire me to get back in the kitchen and confidently know I can make old favorites and discover new dishes with a few tweaks and growing pains along the way. We're still not sure if this will be a permanent change for us, but right now are just grateful for another step towards wellness.

This particular potato salad's greatest recommendation has nothing to do with being low-FODMAP or gluten-free as it's all about what it's got going for it and not what it's missing. What it's got going for it is buttery Yukon Gold and sweet potatoes married beautiful in an unctuous aioli punctuated by the sharpness of good Dijon and pungent garlic. Yukon Golds are probably my favorite potato variety similar to red or new potatoes but with a wonderful buttery taste and a creamy texture. They are excellent mashing potatoes for that reason because you don't need to add nearly as much butter as usual and just a tiny bit of cream or half and half coaxes them into creamy whipped goodness. While sweet potatoes need no introduction this salad is just one more reason to love them any time of day.


Two things I always do when making potato salad: Boil the potatoes in their skins and dress them while they're warm. If you're the type that thinks ahead you will quickly realize this involves peeling and dicing boiling hot potatoes. I use a potholder and a combination of a peeler and butter knife because the skin tends to peel off fairly easily of the hot potatoes. If you're going to skip one of these steps, go ahead and peel (but don't dice) your potatoes while they're raw. There will be much more of a flavor difference if you dress cold potatoes than if you boil peeled potatoes. Make sense? ;)

The recipe below makes a good amount of dressing; that's so you can add it in dollops to the potato salad to get it as creamy as you would like and save the rest to slather on boiled asparagus, hard-boiled eggs, and artichokes. 

One Potato, Two Potato Salad

  • 2 lbs. Yukon Gold potatoes (I used 5 medium sized Yukon Gold potatoes)
  • 2 lbs. sweet potatoes (I used two large sweet potatoes)
 Garlic-Dijon Aioli (adapted from Creamy Garlic Vinaigrette, New Best Recipe)
  • 1/2 cup extra-virgin olive oil
  • 1/4 cup mayonnaise
  • 2 tablespoons white wine vinegar
  • 2 tablespoons lemon juice
  • 1 heaping tablespoon Dijon mustard
  • 2 small garlic cloves, minced
  • 1/2 teaspoon salt
  • pepper to taste
1. If the sweet potatoes are very large, cut them in halves or quarters so that they are roughly the same size as the Yukon Golds. Place the potatoes in a large pot with water to cover. Cover the pot and bring to a boil over high heat. Reduce the heat to medium and boil the potatoes until they are just cooked through, 15 to 20 minutes.
2. While the potatoes are cooking, whisk together the ingredients for the aioli. I made the aioli in my nearly-empty Dijon mustard jar, which allowed me to just shake to my heart's content until combined. You're done when everything emulsifies and is one luscious mass with a much thinner consistency than mayonnaise, similar to natural yogurt. A food processor or hand blender is also great for this task.

3. Drain the potatoes and immediately peel and dice them, transferring them to a large bowl as you go and covering the potatoes with a dish towel as you go to keep them warm. I find it makes a huge difference to dress the potatoes while they're still warm, especially since we boiled them in their jackets and so they are completely unseasoned at this point.

Holding the potatoes in a potholder in order to peel while warm.


Ready to dice!

This is how I dice, cutting the potatoes first into lengthwise planks, lengthwise again 90 degrees into french fries, then finally crosswise into dice.

4. Toss the diced potatoes gently with the aioli to taste. Start with 1/4 cup and if you like your dressing a little creamier add a bit more dressing 1 tablespoon at a time.

This is just as easily at home besides a roast chicken for dinner as it is all by itself for a light lunch or even breakfast.