Saturday, May 18, 2013

One Potato, Two Potato Salad with Garlic-Dijon Aioli


I haven't posted in about six weeks, mostly because for the last six weeks the hubby and I have been trying low FODMAP for a happy tummy, which involves cooking gluten and dairy free, among other things. I've been floundering a bit mealwise; we still don't have an easy and convenient standby with the "safe" foods my husband can eat so every day is a bit of an experiment. I'm slowly discovering another world of marvelous gluten-free blogs that inspire me to get back in the kitchen and confidently know I can make old favorites and discover new dishes with a few tweaks and growing pains along the way. We're still not sure if this will be a permanent change for us, but right now are just grateful for another step towards wellness.

This particular potato salad's greatest recommendation has nothing to do with being low-FODMAP or gluten-free as it's all about what it's got going for it and not what it's missing. What it's got going for it is buttery Yukon Gold and sweet potatoes married beautiful in an unctuous aioli punctuated by the sharpness of good Dijon and pungent garlic. Yukon Golds are probably my favorite potato variety similar to red or new potatoes but with a wonderful buttery taste and a creamy texture. They are excellent mashing potatoes for that reason because you don't need to add nearly as much butter as usual and just a tiny bit of cream or half and half coaxes them into creamy whipped goodness. While sweet potatoes need no introduction this salad is just one more reason to love them any time of day.


Two things I always do when making potato salad: Boil the potatoes in their skins and dress them while they're warm. If you're the type that thinks ahead you will quickly realize this involves peeling and dicing boiling hot potatoes. I use a potholder and a combination of a peeler and butter knife because the skin tends to peel off fairly easily of the hot potatoes. If you're going to skip one of these steps, go ahead and peel (but don't dice) your potatoes while they're raw. There will be much more of a flavor difference if you dress cold potatoes than if you boil peeled potatoes. Make sense? ;)

The recipe below makes a good amount of dressing; that's so you can add it in dollops to the potato salad to get it as creamy as you would like and save the rest to slather on boiled asparagus, hard-boiled eggs, and artichokes. 

One Potato, Two Potato Salad

  • 2 lbs. Yukon Gold potatoes (I used 5 medium sized Yukon Gold potatoes)
  • 2 lbs. sweet potatoes (I used two large sweet potatoes)
 Garlic-Dijon Aioli (adapted from Creamy Garlic Vinaigrette, New Best Recipe)
  • 1/2 cup extra-virgin olive oil
  • 1/4 cup mayonnaise
  • 2 tablespoons white wine vinegar
  • 2 tablespoons lemon juice
  • 1 heaping tablespoon Dijon mustard
  • 2 small garlic cloves, minced
  • 1/2 teaspoon salt
  • pepper to taste
1. If the sweet potatoes are very large, cut them in halves or quarters so that they are roughly the same size as the Yukon Golds. Place the potatoes in a large pot with water to cover. Cover the pot and bring to a boil over high heat. Reduce the heat to medium and boil the potatoes until they are just cooked through, 15 to 20 minutes.
2. While the potatoes are cooking, whisk together the ingredients for the aioli. I made the aioli in my nearly-empty Dijon mustard jar, which allowed me to just shake to my heart's content until combined. You're done when everything emulsifies and is one luscious mass with a much thinner consistency than mayonnaise, similar to natural yogurt. A food processor or hand blender is also great for this task.

3. Drain the potatoes and immediately peel and dice them, transferring them to a large bowl as you go and covering the potatoes with a dish towel as you go to keep them warm. I find it makes a huge difference to dress the potatoes while they're still warm, especially since we boiled them in their jackets and so they are completely unseasoned at this point.

Holding the potatoes in a potholder in order to peel while warm.


Ready to dice!

This is how I dice, cutting the potatoes first into lengthwise planks, lengthwise again 90 degrees into french fries, then finally crosswise into dice.

4. Toss the diced potatoes gently with the aioli to taste. Start with 1/4 cup and if you like your dressing a little creamier add a bit more dressing 1 tablespoon at a time.

This is just as easily at home besides a roast chicken for dinner as it is all by itself for a light lunch or even breakfast.

Thursday, April 11, 2013

German Potato Salad


My high school boyfriend's grandfather was an Air Force pilot during World War II. He met a nurse while being treated for  his wounds in a German hospital and determined he wasn't leaving without her. When I met them they had been married almost 65 years. Beautiful stuff.


Whenever we visited she would make us Wiener Schnitzel, that classic German dish with thin veal cutlets, breaded and fried, served with lemon on top and homemade spatzle and warm potato salad on the side. I often hear this referred to as German potato salad, but perhaps in Germany it's just potato salad? Regardless, I can't help but think of her every time I make it, how perhaps it reminded her of home in those months and years after she moved to America to marry the Air Force pilot.


Now I make it whenever I have a hankering for something warm and comforting. This should do the trick all year long, it's equally at home beside grilled brats in the summer as it is beside braised cabbage and pork loin in the winter. This is good stuff, folks.


German Potato Salad
Adapted from my favorite cookbook.
  •  4 medium potatoes 
    • I used 2 Yukon Gold and 2 red potatoes because I just love the buttery flavor of Yukons. You want a waxy potato for this recipe, not a Russet potato or other starchy potato.
  • 4 slices bacon
  • Optional: 1 medium onion, chopped fine
  • 1/2 teaspoon sugar
  • 1/2 cup white vinegar 
  • 1 tablespoon whole-grain mustard (or brown mustard if you don't have that, just not ballpark yellow mustard)
  • 1/4 teaspoon ground black pepper
  1. Place the potatoes, 1 tablespoon salt, and water to cover in a large saucepan. Bring to a boil over high heat, then reduce the heat to a simmer and cook until potatoes are just tender, about 14 minutes if you're using smallish potatoes and leave them whole like I did. I think potatoes just taste more potato-y if you cook them whole in their skins and chop them up after cooking. When the potatoes are done cooking, scoop out a ladleful of the cooking water, about 1/2 cup, and set aside. Drain the rest of the water off then return the potatoes to the pot and cover to keep warm. 
Water will boil much faster if you cover the pot.


2. While the water comes to a boil, fry the bacon in a large skillet over medium heat, not stirring too much to let it brown and crisp, about 5 minutes.


3. Remove from the skillet, chop chop chop. and set aside (which to me means leave on your cutting board until you need it.)


4. If you have a bunch of fat in the skillet, pour the excess off and leave about 2 tablespoons in the skillet.


5. Optional: you could add 1 medium onion, chopped fine at this point and that would be delicious. Cook until getting soft, 4-5 minutes over medium heat. Hubby and I are trying a new diet to curb some tummy troubles and avoiding onion at the moment. But you should add it if you like! Onion is delicious. 

7. Stir in the sugar until dissolved, add the vinegar and reserved potato cooking water. Bring to a simmer and simmer for about 3 minutes, until it reduces down a bit.  Turn off the heat and whisk in the mustard and pepper.

8. While the dressing simmers, chop the potatoes up into 1/2 inch pieces. I cut mine lengthwise then lay them on the flat sides and cut them into chunks.


9. Add the potatoes and the bacon to the skillet and stir to combine. Taste and add salt and pepper if necessary. The potatoes might seem a little soupy at first but will thicken right up as they sit.

Enjoy!


Thursday, March 7, 2013

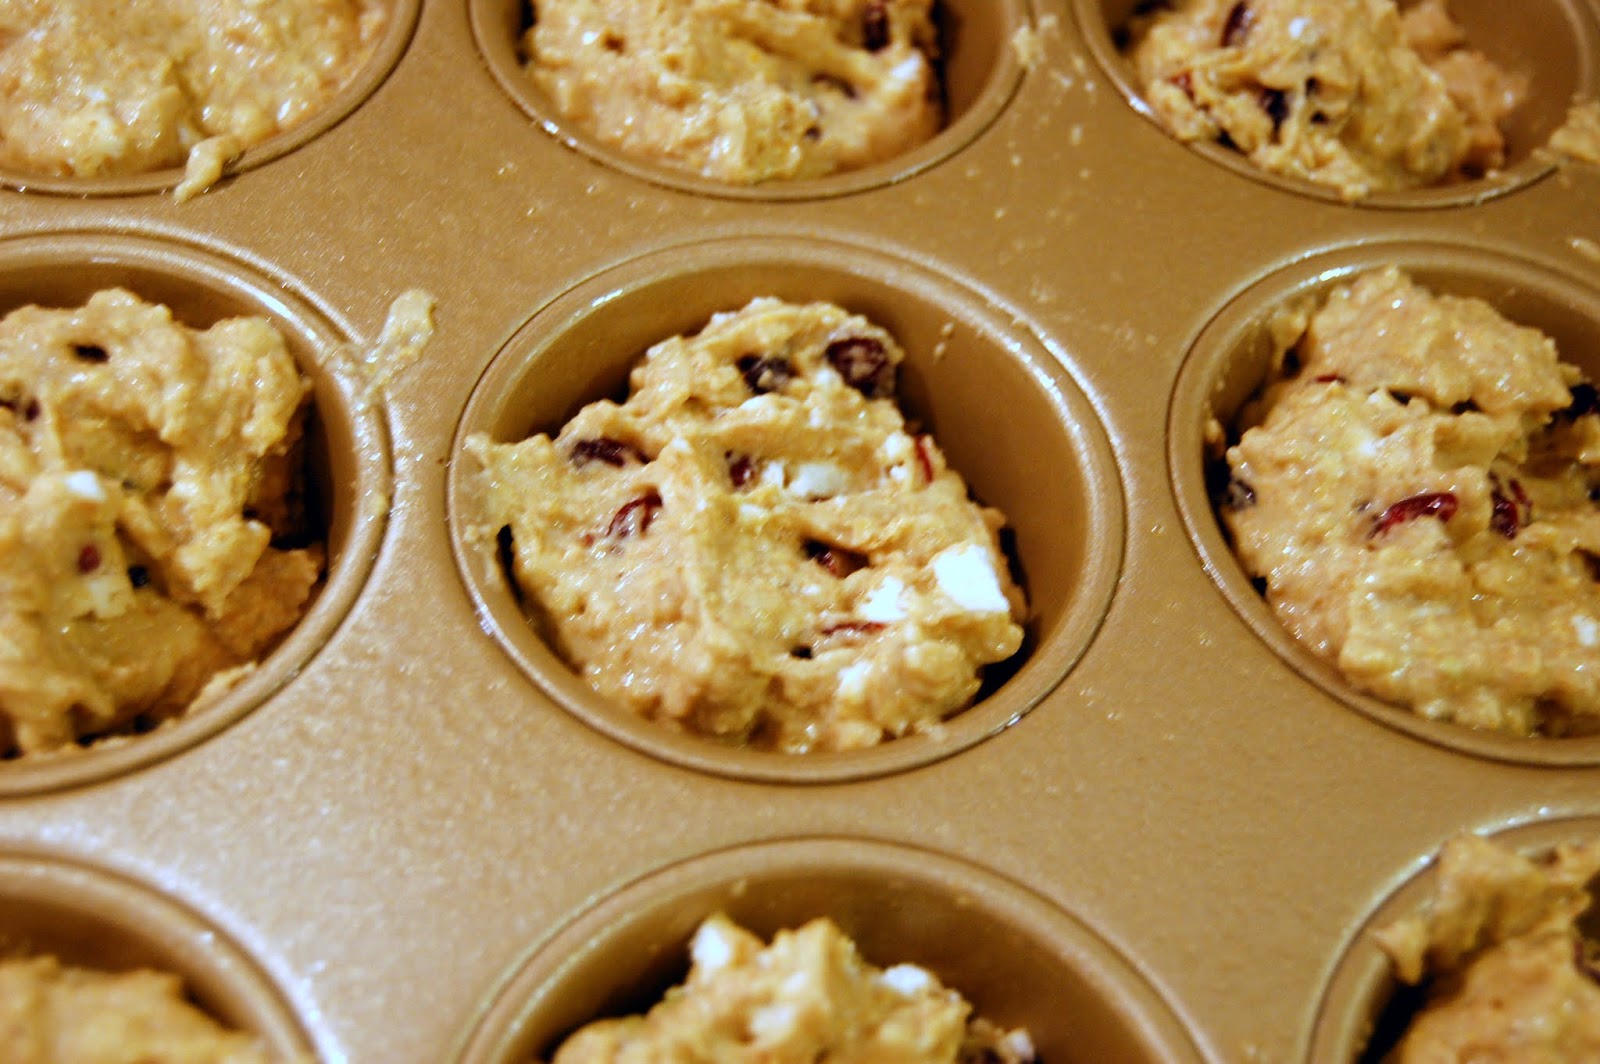
Whole Grain Corn Muffins with Goat Cheese and Cranberries

I debated whether or not to advertise this cornbread as vegan, because it totally is, except for the goat cheese. Story of my life.


Fun fact: did you know you can use a really ripe avocado instead of eggs or oil in your baked goods? Works wonders. Think about it: it's a little unctuous ball of butter and eggs all in one. I think the fat in the avocado is the reason they work much better than mashed bananas or applesauce as an egg replacer. You get fat and moisture without sweetness, giving you a lot of flexibility in your choice of baked goods. You want to use really, really ripe avocados when you do this, ones that are past the guacamole stage. The ones they sell two for a dollar in the produce clearance aisle? Those are perfect.


Honey? And avocado? That sounds weird. But hey, we're making vegan cornbread with avocado here (and goat cheese and cranberries) so we're putting weird on the back burner for the moment.

Savory.
Sweet.
Scoop.
Bake.
I used my immersion blender (definitely another favorite piece of kitchen equipment) to whip up the avocado, honey and soymilk right in the bowl. If you don't have an immersion blender, or your avocado isn't really, really ripe you might want to mash up your avocado in a separate bowl and then beat in your honey and soymilk.

Truth be told these vegan/not vegan corn muffins don't know exactly what they want to be. They are just as delicious for breakfast as they are with dinner (we ate them with sweet potato soup) or for an afternoon snack. Goat cheese and cranberries is really a no-brainer, it's got the sweet/salty, chewy/creamy contrast going on. Both are a lovely surprise studded throughout the cornbread, whose texture is decidedly un-vegan. I make cornbread at least weekly and I was surprised at how little I could tell a difference between this cornbread and my standard favorite recipe, which calls for 1/2 cup of butter and 2 eggs (totally not a Southern recipe, I've converted...).


It doesn't really matter what these muffins want to be; anything studded with chunks of melted goat cheese can't be anything other than delicious.

Whole Grain Corn Muffins with Goat Cheese and Cranberries

  • 1 cup yellow cornmeal
  • 1 cup whole-wheat flour
  • 1 teaspoon baking powder
  • 1 teaspoon baking soda
  • 1/2 teaspoon salt
  • 2 tablespoons honey
  • 1/2 ripe avocado
  • 1 3/4 cups soymilk
  • 1/2 cup crumbled goat cheese
  • 1/2 cup dried cranberries
  1. Preheat oven to 375 degrees. Grease a 12-cup muffin tin.
  2. Thoroughly combine your dry ingredients in a large mixing bowl.
  3. In a separate bowl, mash up your avocado and beat in the soymilk and honey, mixing well.
  4. Make a well in the center of the dry ingredients and stir the wet and dry together with a wooden spoon or mixing spoon until just combined. Gently stir in the goat cheese and cranberries.
  5. Scoop into prepared muffin tin and bake for 15 to 20 minutes, until muffins are well risen and lightly browned on top.

Wednesday, March 6, 2013

Homemade Crackers, or, Defining Adulthood


Did you know you can make your own crackers? I had no idea how easy it would be. Flour, olive oil, water, *boom* homemade crunchy little rounds of goodness.


Those little specks in there? Raw quinoa! I certainly would never have thought of that were it not for this wonder but they lend a pleasing additional source of crunch. These are a fun, comforting, and unfussy project for a rainy Sunday afternoon.

I made these in my stand mixer but all it really needs is a fork and a mixing bowl. Stir together dry ingredients, stir in olive oil and water, and roll out.  Do as I say, not as I do: the dough in the pictures below is rolled about twice as thick as I would like it next time (and there will be a next time: so many possible flavor combinations here).  The crackers themselves are delicious but a little shortbread-y rather than delightfully thin and crispy.


The other wonderful thing about these is that of course you can flavor them however you'd like. I used a teaspoon of an herbes de Provence spice blend that has been languishing in my cabinet and can only faintly taste the seasoning, I would start with 1 1/2 teaspoons dried herbs, etc. and go from there.  I also left these very lightly salted. If you want something more like commercial crackers I would add another 1/2 tsp. of salt to the dough and salt the tops of the crackers as well before going into the oven. 


On a completely unrelated note, I bought a pair of jeans last night. They were not from a thrift store. They cost more than a salad and sandwich combo at my favorite lunch spot. They cost about as much as dinner at a fancy restaurant if you get the salad and a glass of wine, too. I am not used to this. I feel like this more firmly marks my passage into adulthood than paying rent or car insurance or even owning a slow cooker.

Then the cracker that fell on the floor when I was turning my cookie sheets around caught on fire in the oven, unbeknownst to me until smoke started billowing from by back right burner. Making crackers is risky business, folks. The little charcoal disk caught on fire again when I was roasting vegetables for dinner, and that's when I realized: it's ok. I still have a ways to go.


Whole Wheat Crackers
Adapted from The Homemade Pantry by Alana Chernila

  • 1 cup flour, plus additional for dusting
  • 1 cup spelt flour or whole wheat flour (I used wheat)
  • 1/2 teaspoon baking powder
  • 1/3 cup whole, uncooked millet (I used quinoa)
  • 1/3 cup ground flax seeds
  • 1/2 teaspoon kosher salt, plus additional for sprinkling
  • Optional: 1 1/2 teaspoons any herbs or spices 
  • 1/2 cup plus 2 tablespoons olive oil
  • Freshly ground pepper

  1. Preheat the oven to 350. In a medium bowl, combine the dry ingredients. Add the olive oil and combine with a fork.  Slowly add 1/2 cup water. I used my stand mixer fitted with the dough hook for this process, Alana recommends working the water in with your hands until the dough holds together, up to 1/4 cup additional water if needed. Knead the dough with your hands for 2 minutes or the stand mixer for about a minute until it is smooth and very workable.
  2. Turn the dough out onto a floured surface, press into a flat disk, and roll out until the dough is 1/8 to 1/4 inch thick. Cut into desired shapes. I used cookie cutters and used a bench scraper to cut the remaining dough into squares; a pizza cutter would also work nicely and a biscuit cutter would make lovely rounds.
  3. With a spatula, transfer the dough to ungreased baking sheets and sprinkle with salt and pepper, if desired. Bake for 20 to 22 minutes, rotating the crackers halfway through. Be careful not to drop your crackers on the floor, oven or kitchen, at this point. Transfer to a wire rack to cool.
Enjoy with cheddar cheese and your favorite mug of soup. 

Monday, February 25, 2013

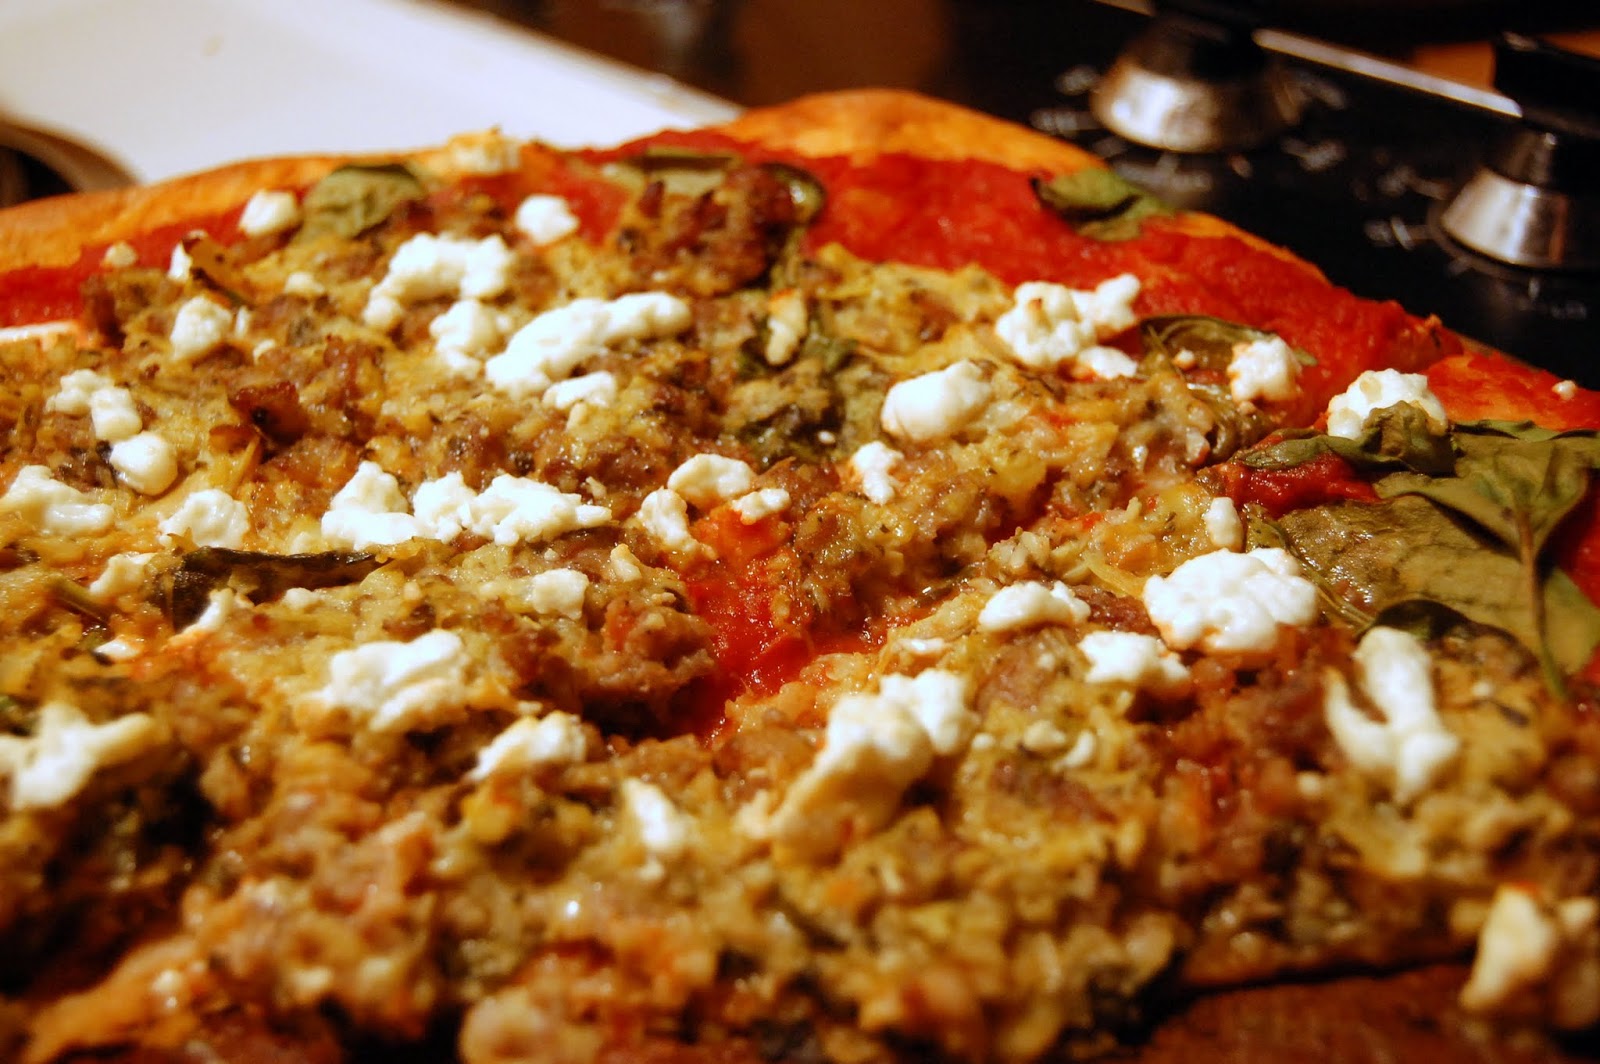
pizza.


That would be a spinach artichoke sausage goat cheese pizza. What would Mellow Mushroom call that? I have no idea how to make that name any shorter but geez was this good. I discovered a few keys to home pizza making that I think bear repeating, it made the crust on this pizza wonderfully crisp:
  • Crank the oven up to at least 450, 500 is probably better but I just wasn't sure my rickety oven could handle that.
  • Put your cold pizza stone on the bottom rack of the cold oven before you preheat it so that they both heat up together.  
I believe these two steps together produced a nice crisp crust which I've found is pretty hard to achieve. I blame my lack of a wood-burning oven. For an extensive look at baking pizza at home, the folks at Slice have written miles on the subject and it's an excellent resource for the home cook. I plan to work my way through the recipes whenever I have the forethought to make my own pizza dough instead of buying the dough balls from Harris Teeter.

Here's a loose recipe for Sunday night's version, adapted from this lovely tome:

  1. If you're making your own dough from scratch, it should have completed its second rising and be ready to use before you start preheating the oven. If you don't happen to have three hours to kill, take your dough (I go with the dough balls they sell in the deli section because to me it's the best combination of taste and convenience) out of the refrigerator and let it warm up a little.
  2. Position your oven rack to the lowest setting, making sure to allow room to maneuver the pizza in and out of the oven later.
  3. Place your pizza stone (if you have one) in the oven and preheat the oven to 450. 
  4. While your oven is preheating, saute 1/2 lb. of sweet italian sausage until thoroughly cooked. Add 2 cloves fresh garlic, minced and saute until fragrant, 30 seconds or so.
  5. Drain and rinse 1 can of artichoke hearts. Puree in a hand blender or chop finely with 2 tablespoons of fresh basil. Mix together with the cooked sausage and set aside until ready to top your pie.
  6. I have a pizza stone but no pizza peel, so I waited until my oven had preheated and then placed the preheated stone on my stovetop while I stretched the dough out by hand and plopped it directly onto the stone.
    1. To stretch out by hand I hold the dough ball close to one edge perpendicular to the floor, using the thumb of both hands to pinch and form the outer crust, and turn it around and around, letting gravity naturally stretch the dough out.  This is much easier to me than using a rolling pin since you can make the dough do what you want it to but it's also easy to cause tears; it's really up to you. If you do decide to use a rolling pin make sure your dough is room temperature or it will be frustrating!
  7. I like to use simple sauces for a base, like crushed tomatoes drizzled with olive oil and basil or plain olive oil and basil or marinara sauce. Just make sure to add a little seasoning if you're using something like plain crushed tomatoes or, at least to me, the finished dish will taste a little tomato-y. For this recipe I used 14 ounces crushed tomatoes (and I didn't season it but I should have. Now we all know better :) )
  8. Cover the surface of the pie with a few handfuls fresh baby spinach, just so the pie is covered in a thin layer.
  9. Dollop the sausage mixture in rounded tablespoonfuls all over the surface of the pizza dough. The topping mixture isn't very spreadable so it's best do dollop it in small amounts and closely together so you don't have to do too much spreading.
  10. Crumble 2-4 ounces (depending on your taste) fresh goat cheese over the surface. (Now would be a good time to add sundried tomatoes; I did not but hey, it's your pizza.)
  11. Bake in the preheated oven for 15 minutes, until the crust is evenly brown and lovely.
  12. Let cool for at least 5 minutes before slicing up.  
Glory.
Glory.

Hallelujah.

Enjoy pizza night! Break out the pinot noir if you've got it; this guy would really appreciate it.

Sunday, February 24, 2013

breakfast.

Chili Con Carne, Enchiladas, Salsa, Egg

That would be black bean enchiladas, topped with chili con carne, topped with a fried egg over easy, topped with salsa. For breakfast. Man, typing that made me hungry and also made me think I should have put sour cream on top as well. All straight out of the fridge, just cleaning up the dinner leftovers from the week and it took about 5 minutes to put together. With a good strong cup of coffee of course. It doesn't make sense in my head but I know from experience that nothing tastes better to me with southwestern lumberjack-type breakfasts like huevos rancheros or whatever you want to call that up there than coffee.


Lord knows I don't eat breakfast like this every day, nor would I want to, but for some reason I am always starving when I wake up on Saturday mornings. I had a roommate in college that always ate her takeout leftovers for breakfast: Lamb Rogan Josh, General Tso's Chicken, cold mozzarella sticks, didn't matter. It seemed so odd to me at the time but I think she has the right idea: before cereal and muffins and the like took center stage, people probably ate leftovers for breakfast quite often.That's a good question, actually. We never see them eating breakfast on Downtown Abbey but I know the must have. Perhaps that's for another post.

What about you? Are you a breakfast eater? Savory or sweet? Lumberjack breakfast or muffin and a yogurt?


Wednesday, February 20, 2013

On Meal Planning

How do you usually make it through the week? Food-wise, that is.  Do you skip breakfast, eat a can of soup for lunch and, exhausted yet ravenous when you get home, have a beer and chips and guac and call it dinner? Because that's exactly what I did my first few years out of college, which is strange when I consider that for the first 22 years of my life I was a three-squares-a-day kind of girl. Then people stopped making food for me and something about figuring out how to work 40+ hours a week and fit in all those things you find personally fulfilling at the same time, like baking (which is another dinner option) and reading and working out, my meals were the thing to go. 

When I got married I discovered that my husband grew up in a household where each night's meals were affixed to the side of the fridge schedule-style, conveniently communicating each night's dinner. The boy also gets hungry, a lot hungrier than I am for dinner so chips and salsa were not gonna cut it. So I started meal planning for the first time in my life. And I love it.


I hear that you can save money by meal planning but I think that's for people who have much more restraint than I when grocery shopping. So far I haven't mastered the concept of buying what's on the list and only on the list. But hey, I would never buy cereal or frozen waffles if I did. I tend to meal plan on a quiet evening while watching Netflix. I love reading food blogs and recipes online, but for some reason I'm very attached to my cookbooks and cooking out of those is much more enjoyable than saving recipes online. Sometimes I don't get much accomplished or nothing sounds good or I end up planning beef every night for dinner and only realize it after the fact, but sitting down and thinking about what's in the fridge and what we'd like to eat next week just helps. It's also nice to come home from work and not have to think about what to make but just have to make it. We ended up eating a lot of meat last week so I went vegetarian with this week's plan:

Monday

Smoky Black Bean Enchiladas

Tuesday

Veggie Burgers

Wednesday

Potato and Chickpea Stew

Thursday

Green Lentils and Spinach w/ Hard Boiled Eggs on Toast

As you'll notice I don't tend to plan side dishes, etc. and I usually only plan 3 or 4 nights a week to leave some flexibility for leftovers or simple meals like spaghetti if I feel like it. Also, the days don't really mean anything to me that's just how my current meal planning template is organized. For instance, so far this week we've had the Green Lentils and Spinach (really, really good) and the Smoky Black Bean Enchiladas (also very good) and I think tonight I'm going to make spaghetti. I'll probably also buy some good bread to go with the stew and some salad to go with the veggie burgers, and we try to always have frozen veggies in the freezer and some quick-cooking grains in the pantry to fill in meals as needed. I will echo the general advice of meal planning, shopping, and cooking on three different days so as to not go crazy. 


For several weeks in a row I did a big cooking day on Sunday and filled our fridge with casseroles. As lovely as it was to know I only had to warm a nice meal up every night, there's only so many types of dishes you can make ahead, casserole and stew-type things, and I try not to spend my Sunday afternoon cooking if it feels like a chore and I'd rather take a walk. So now I leave a little more flexibility in my schedule and my menu for the week.  What works for you? How do you keep costs low and taste and nutrition high for weeknight meals, if those are some of your goals?

Happy Wednesday!