Showing posts with label make ahead. Show all posts

Sunday, November 24, 2013

Spinach and White Bean Lasagna with Pumpkin Cashew Cream (Vegan, Soy and Gluten Free)


I made a glorious discovery this weekend with the creation of this equally glorious lasagna: cashew cream. It's something I've read about but put in the "I'm not treehugger enough box" along with turning off the shower when I shave my legs and making my own organic yogurt.  But cashew cream, as it turns out, is super easy!  Literally throw some cashews and a water in a blender and let 'er fly.  5 minutes later there's this wondrous, slightly sweet substance that acts suspiciously like flour, butter, and dairy-laden bechamel in this lasagna worthy of the Thanksgiving table.  

Wondrous stuff...it is actually creamy and slightly sweet
This is with the pumpkin added in as well..thick enough to stand up a spoon!
I love serving this at events where folks are low-FODMAP (just leave out the beans, garlic, and onions), vegan, gluten-free, soy-free, or all of the above. It's nice to actually be able to eat at a party or holiday event! Even if you have no dietary restrictions at all, this lasagna is the bomb and perfect for chilly weather. It also holds up extremely well wrapped up in the fridge, baked or unbaked, so you can make it ahead of time and save it for a busy weeknight.


Spinach and White Bean Lasagna with Pumpkin Cashew Cream 
(Vegan and Soy and Gluten Free)

For the Cashew Cream:

  • 3/4 cup raw, unsalted cashews
  • 1 1/2 cups water
  • 1/4 teaspoon nutmeg
  • 1/2 teaspoon salt
  • 1/4 teaspoon pepper
  • 2 cloves garlic, minced
  • 1 15-ounce can pumpkin puree
For the Spinach filling:
  • 1 tablespoon olive oil
  • 1/2 onion, chopped fine
  • 1 carrot, chopped fine
  • 2 cloves garlic, minced
  • 1/2 teaspoon salt
  • 1/4 teaspoon pepper
  • 1 10-ounce box frozen spinach (defrosted or not, won't matter because you'll cook it in the pan)
  • 1 can cannellini beans or other small white beans
For assembly:
  • 1 box gluten-free lasagna noodles (I ordered mine online; I haven't been able to find gluten free lasagna noodles in stores)
    • Note: if using gluten-free lasagna noodles, there is no need to cook the noodles ahead of time, they will soften fine in the oven. If using regular or whole wheat lasagna noodles, cook the whole box for 1-2 minutes less than the box says before assembling the lasagna.


1. Preheat the oven to 350 degrees.
2. Put cashews and water in food processor or blender.
3. Blend on high for 3-5 minutes, until smooth, thick, and creamy.
4. Scrape down the sides of the blender or food processor to blend well
5. Add the minced garlic, nutmeg, and black pepper and pulse to blend.
6. Add the pumpkin and process until fully blended.


7. Meanwhile,  heat the olive oil in a nonstick skillet until shimmering. Add the chopped onion and carrot and cook over medium-low heat until the onion is translucent.
8. Add the salt, pepper, and minced garlic and cook until the garlic is fragrant, about 30 seconds more.
9. Remove from heat. 


10. Spray a 2 quart casserole dish with nonstick cooking spray. Lay 3 lasagna noodles, slightly overlapping, in the bottom of the casserole dish. 
11. Cover the lasagna noodles with half of the spinach mixture.
12. Cover the spinach mixture with one-third of the pumpkin cashew cream mixture in an even layer.

I got a notion to add some dried sage at this point. So I did.
13. Add another layer of lasagna noodles, spinach mixture, and one-third of the pumpkin cashew cream sauce.
14. Add a final layer of lasagna noodles.
15. Cover the lasagna noodles completely with a layer of the pumpkin cashew cream sauce. You want to make sure the noodles are completely covered or they won't cook sufficiently in the oven.

Ready for the oven!

16. Cover tightly with a double layer of aluminum foil (the steam produced by the rest of the lasagna in the oven is what cooks the lasagna noodles!)
17. Bake covered for 45-50 minutes, until piping hot and wonderfully fragrant.


That's a mighty good-lookin' lasagna.


Sunday, June 23, 2013

Make-Ahead Gluten Free Layered Burrito Casserole for Two


There's so much to love about this casserole, most of which I tried to cram into the title. This was born out of pantry ingredients and a good dose of laziness-I knew I had all the ingredients on hand for taco night but I know myself well enough to know I often lack the motivation to undertake even that minimal amount of cooking on a weeknight. I love the convenience of making at least a few of the week's meals ahead of time and this is a perfect meal to cook on a Sunday and have for dinner during the week--it keeps in the fridge for a few days and the corn tortillas didn't get soggy as I expected. This is actually quick enough it's feasible to make in the morning before you leave for work and have the comfort of knowing dinner is ready and waiting for you at the end of the day. (Insider tip: as tempting as it is to play Superwoman, don't try this method the same day you get up early to work out/do the bills/finish that report. That's a good way to end up late for work and forget to turn the stove off and have to go back home to turn the stove off, of course making you even more late for work. Just saying.)

This serves 2-4, depending on your appetite, so it's not quite as daunting to finish as a 9x13 casserole dish if there's only one or two of you in the house. This will last you a couple of dinners or dinner and lunch the next day. (Leftovers-for-lunch day is actually a good day to work out/pay the bills/finish your report in the morning, by the way, because who doesn't love playing Superwoman every once in awhile?)
  

Make-Ahead Gluten Free Layered Burrito Casserole for Two
  • 1 16-oz jar salsa (I like Newman's Own)
  • 6-8 corn tortillas
  • 1 can black beans, rinsed and drain
  • 1 can diced tomatoes or diced tomatoes with chilies, drained
  • 1 packet pre-cooked whole grain southwestern rice blend (I used Seeds of Change, which is delicious) If you don't have these on hand, just sub in 2 cups cooked brown rice)
  • 1 8-oz. bag shredded Mexican blend or cheddar cheese
  • 8 oz. boneless, skinless chicken breast (2 regular-sized BSCB)
  • 1 tablespoon taco seasoning from a packet or 1 tablespoon chili powder seasoning blend (I use Penzey's Chili 3000 and love it)
That's it! This is so much more than the sum of its parts. Let's get started:

1. Coat a medium skillet with 1 or 2 tablespoons of olive oil and heat over medium heat until the oil is shimmering. Cut the chicken into chunks or bits, depending on your preference, just keep them about the same size. Let the chicken cook without moving for two minutes, shake the skillet up and let the chicken cook again for 2 minutes without stirring (as Anne Burrell likes to say, "brown food tastes good!") When the chicken is almost done cooking, stir in the seasoning mix and stir to combine. Remove the chicken from the skillet and set aside.
2. Stir in the can of rinsed black beans and the can of drained tomatoes. Taste a bit of the mixture and add a bit more seasoning if desired.

Whew! That was a lot of cooking.  Ok, now it's ready to put the rest together!

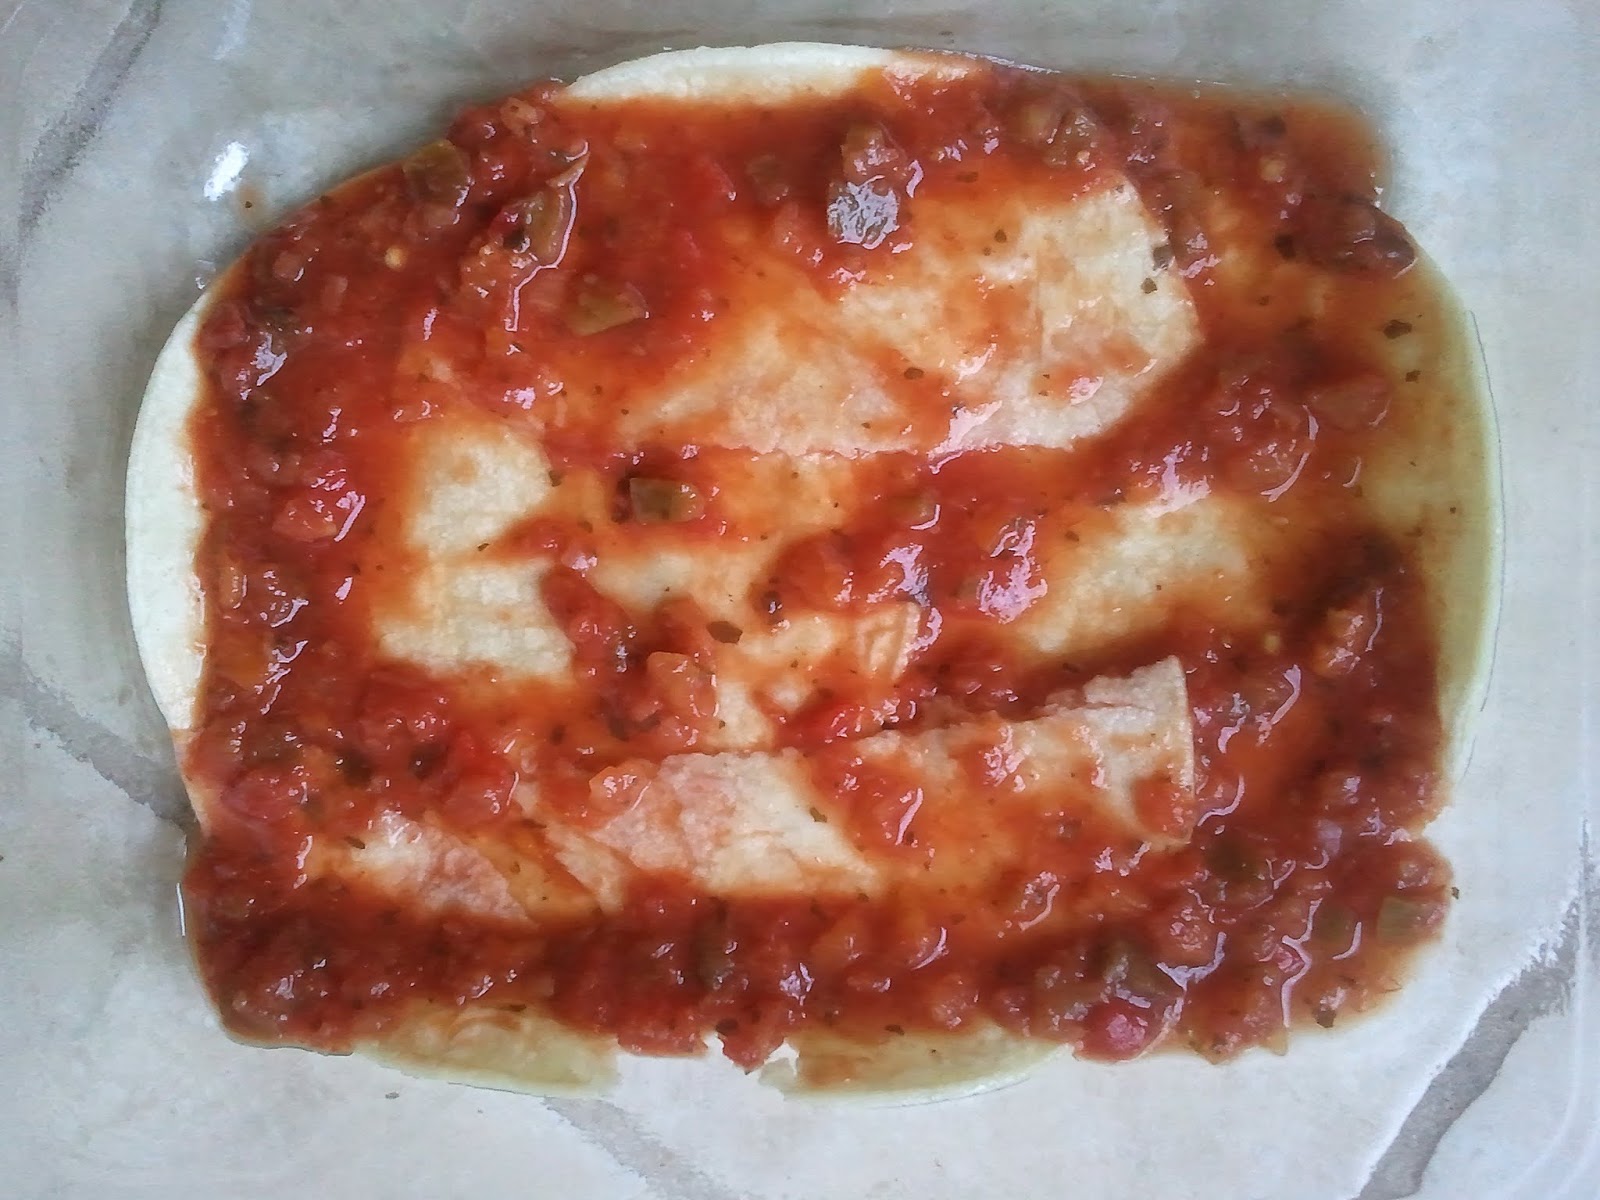
3. Put a thin coating of salsa on the bottom of a 2-quart casserole dish. Cover with a single layer of corn tortillas by breaking up some of the tortillas to evenly cover the bottom of the dish. 


4. Top the tortillas with another thin layer of salsa.


5.Break up the rice packet and sprinkle 1/3 of the rice packet over the tortillas. 


4. Top with 1/3 of the chicken and bean mixture, then sprinkle with a thin layer of cheese.


5. Repeat this layering process, starting with the corn tortillas and ending with the cheese-covered chicken and bean mixture.

6. Create on final layer of salsa-rice-chicken and beans, but this time skip the top layer of cheese.

7. You can either bake the casserole immediately or cover the whole think with plastic wrap and stick it in the fridge for up to 3 days.

8. When you're ready to bake, cover the dish tightly with aluminum foil and preheat the oven to 350 degrees.  Bake for 15 minutes if at room temperature or 20 minutes if straight from the fridge (if you are making this ahead of time, it will cook a bit more evenly if you take it out of the fridge and let it sit on the counter for 15 minutes or so, but then again it doesn't make a whole lot of difference).

9. Take the casserole out of the oven and crank the temperature up to 400.  Sprinkle the casserole with a final layer of cheese and bake an additional 15 minutes until lovely and browned and bubbly.


Yum. This is just as delicious with a cold lager as it is the next morning with a fried egg on top and good black coffee. Leftovers for breakfast are where it's at.

Enjoy!


Friday, September 28, 2012

Warm Butternut Squash and Rice Salad with Brussels Sprouts, Apples and Dijon Vinaigrette


I just Googled the name to make sure it is indeed "Brussels" as in the city and not "Brussel" sprouts. Conveniently, there is a www.brussels-sprouts.com, which informed me that "the modern Brussels sprout that we are familiar with was first cultivated in large quantities in Belgium." I like to know these things. Etymology aside, if you love Brussels sprouts like I do you will love them in this dish; if not feel free to leave them out, the butternut squash is the real heavy-lifter here.


I wasn't originally planning on putting this on the blog but it turned out so darn delicious I had to share it with you. I used instant brown rice which I think is truly one of the greatest inventions since sliced bread and just as convenient, making this doable for a weeknight dinner. In the background there is the dressing, a simple apple cider and Dijon vinaigrette which would be equally delicious brushed on grilled pork or grilled chicken.  You could also use cubed sweet potatoes if you don't want to fool with peeling the butternut squash.  I used a McIntosh apple because that's we had but I think this would work better with good ol' Granny Smith, which holds its shape when baked/roasted/grilled/sauteed much better than a McIntosh.  This would also be delicious with toasted walnuts and cranberries for Thanksgiving.  I told you I'm not really into recipes, right? It's your food-have fun with it!

Warm Butternut Squash and Rice Salad with Brussels Sprouts, Apples, and Dijon Vinaigrette


  • 1 butternut squash, peeled and cubed
  • 1 small apple, cubed
  • 1 medium onion, diced
  • 1 cup frozen Brussels sprouts
  • Salt and pepper (about 1/2 and 1/4 of a teaspoon, respectively, if you like to measure!)
  • 2 cups chicken broth, homemade if you have it and low sodium if you don't.
  • 1 cup instant brown rice
For the Dijon Vinaigrette:
  • 2 tablespoons apple cider vinegar
  • 1 tablespoon Dijon mustard
  • 1 tablespoon olive oil
  • Dash of salt and dash of pepper
  1. Heat 1-2 tablespoons oil in a large skillet over medium heat until oil shimmers but does not smoke. Add onions and cook for 1-2 minutes, until just starting to turn translucent.  Add butternut squash, stir to combine, and cover the skillet.  Cook for 5-10 minutes, until the squash is just starting to get tender.  Life the cover, stir everything around, add the frozen Brussels sprouts, and cover again. Cook for an additional 5 minutes or so, until the Brussels sprouts are heated through and the squash is almost tender. You don't want to cook anything all the way through because this is a one-pot dish and you'll be cooking the pot right in the pan with the squash, so it will finish cooking along with the rice.
  2. Add 2 cups chicken broth to the skillet and bring to a simmer. Add the 1 cup brown rice, cover, and simmer for 10 minutes, until broth is absorbed and rice is cooked through.
  3. Meanwhile, prepare the vinaigrette: whisk together all ingredients in a small bowl or small measuring cup. Whisk well to emulsify.
  4. As soon as the rice is done cooking, while it is still cooking, add half the vinaigrette and toss. Taste the dressing at this point: my husband prefers things rather plain (*cough*bland*cough*), so I only used half the dressing in the finished dish and added additional dressing at the table. If you can't have too much flavor, like me, you may want to add the other half of the dressing. If not save it in the fridge, it's a great all-purpose vinaigrette.
What about you? Are you a Brussels sprouts lover or hater?Any foods you love that people tend not to like? Brussels sprouts is definitely on my list there, along with Rye bread, sardines, whole-grain mustard, and I'll stop there because I just made myself a nice little sandwich :) What's on your list?

Saturday, August 25, 2012

Mediterranean Barley-Stuffed Peppers

I tried meal planning this week. In my house growing up there were about 10 different dinner options, including three different "casseroles" that start with a box of mac' and cheese. Every day about 5:00 pm, my dad or my mom or my sis, whomever happened to be home, would say "what do you want for dinner?" and on we went. My husband, however, grew up with the week's meal plan taped to the fridge, something I thought went out of fashion the same time as the "no white after labor day" rule. In the spirit of compromise, I tried it last week and it turns out I love it.

I had to get used to shopping with a list. When I shopped just for myself I would go shopping on Sunday afternoons when they make all the markdowns, buy whatever was on clearance, and that's what I'd eat for the week. Yes, I'm that crazy lady at the grocery store with a cart full of markdowns simultaneously trying to rifle through her coupons and steer her cart at the same time.  I also ate more meat last week than I have in the last month. I have that old American mindset that it doesn't look like a "real" meal without a hunk of meat on the plate. Weird, because on my own I rarely eat meat. Last night Jim was working late and my dinner was two pieces of toasted Italian bread with hummus and bruschetta and a glass of wine. So simple and so satisfying.

In that spirit, I've toned down our meat for the upcoming week in an effort to cut costs and get back to my veggie-loving roots. Here's a lovely recipe that reflects that, Mediterranean Barley-Stuffed Peppers. They would be delicious with some herbed goat cheese, good bread and a salad. Actually everything would be delicious with herbed goat cheese, good bread and a salad. But we're here to talk about the peppers.

Mediterranean Barley-Stuffed Peppers


 1. Wash two bell peppers (I used one green and one red) and cut in half through the stem from top to bottom. Empty out the seeds and ribs inside. I like to cut off one small slivery from the back of the pepper half so that it will lie flatly on my baking sheet.  Set these aside while you prepare the filling.
(That bowl on the left is some bread cubes for a panzanella salad to go with!)

2. Chop one onion and get that started sauteing in a skillet over medium heat. Cut two zucchini into medium chunks (they're the only thing with any texture in the finished dish). Add to the onion in the pan and stir everything around. I used a nonstick pan so I actually did not use any oil at all, but feel free to use a tablespoon of olive oil if you're not using nonstick. Add some salt (1/2 tsp) at this point for seasoning. I think it's important to season + taste at every level of a dish so the finished dish is well-balanced and well-seasoned. I also added a splash of red wine at this point, cuz that never hurts. It just adds a little depth of flavor. I would add a tablespoon of balsamic vinegar if you don't use the wine.

3. I usually have a big bowl of cooked whole grains in the fridge. This week it was barley. I get pearled barley from the story because it's so cheap! Once your onions are translucent add 1 1/2 cups of cooked barley. If you need to cook the barley from scratch, bring one can of reduced-sodium chicken broth (or 1 3/4 cups of water or homemade chicken broth if you'd prefer) to a simmer and add 1 1/4 cups of barley and simmer for 40 minutes, until the liquid is absorbed.


Yup. That's how I add the barley. What can I say? I like to cook with my hands.

4. I had half a jar of spaghetti sauce in the fridge, so I added that. If I hadn't had the spaghetti sauce in the fridge I would have opened up a can of tomato sauce (8 oz) and used that.

At this point, the mixture tasted much better than I expected, but I added about 1/2 tsp. each of dried basil and dried oregano for a little freshness.

5. Fill the peppers! I took a little spoon so I could pack as much filling as possible in there.

5. I baked these guys at 400 degrees for 35 minutes, until set, browned, and bubbly.


Let me know how yours turns out!