Showing posts with label Vegetarian. Show all posts

Tuesday, November 26, 2013

Savory Cranberry Pomegranate Red Wine Sauce

Oh cranberries. You so photogenic.

I love homemade cranberry sauce for so many reasons, not the least of which is the fact that I never make it the same way twice.  

The basic formula is a 12-oz bag cranberries to 1/2 cup liquid to 1 cup sugar; however you can use any sweetener and any liquid you'd like. Cranberry Orange with a splash of Grand Marnier? Yup. Cranberry Raspberry? Cranberry Apple Walnut Celery? Yup yup and yup. I like to remember to add something sweet, salty, chewy, and crunchy to my cranberry sauces for a perfect balance of flavors. I also like my cranberry sauce much less sweet than the formula above and generally cut the sugar in half or more. Just taste a little bit when it's done cooking and adjust for sweetness if you'd like. Enjoy and have fun with it!

This one uses pomegranate seeds for some lovely texture, crunch and sweetness.


This particular cranberry sauce is very savory and not very sweet; it would be a great accompaniment to ham, pork, or turkey and an even better spread for the day-after sandwich. The maple syrup and dijon is a great one-two punch of sweet and pungent that makes for a lovely balanced sauce. 

Savory Cranberry Pomegranate Red Wine Sauce


  • 2 cups raw cranberries
  • 1 cup dry red wine (I used Tempranillo)
  • 1/4 cup maple syrup
  • 1/4 cup brown sugar
  • 1 teaspoon dijon mustard
  • 1/4 teaspoon salt
  • 1/4 teaspoon ground pepper
  • 1/2 cup raw pomegranate arils
1. Cut the pomegranate in half and submerge the halves in a bowl of cold water. Using your hands, dig the pomegranate arils out of the pomegranate. When all the arils are free, pour the arils and water through a colander and pick out any pieces of pomegranate membrane still remaining. 


2. Combine the cranberries, red wine, sugar, salt and pepper in a saucepan.


3. Cook over medium heat for 10-15 minutes, until thickened. The cranberries will start to swell and pop and will then continue cooking until the whole sauce is a gorgeous uniform garnet color. 

Cooking...

Still cooking...


Voila! Cranberry Sauce!

4. Stir in the maple syrup and dijon mustard.
5. Stir in the pomegranate arils.

Note: The cranberry sauce will thicken a lot in the refrigerator as it cools. Makes my mouth water just looking at it!


Enjoy and HAPPY THANKSGIVING!

Saturday, May 18, 2013

One Potato, Two Potato Salad with Garlic-Dijon Aioli


I haven't posted in about six weeks, mostly because for the last six weeks the hubby and I have been trying low FODMAP for a happy tummy, which involves cooking gluten and dairy free, among other things. I've been floundering a bit mealwise; we still don't have an easy and convenient standby with the "safe" foods my husband can eat so every day is a bit of an experiment. I'm slowly discovering another world of marvelous gluten-free blogs that inspire me to get back in the kitchen and confidently know I can make old favorites and discover new dishes with a few tweaks and growing pains along the way. We're still not sure if this will be a permanent change for us, but right now are just grateful for another step towards wellness.

This particular potato salad's greatest recommendation has nothing to do with being low-FODMAP or gluten-free as it's all about what it's got going for it and not what it's missing. What it's got going for it is buttery Yukon Gold and sweet potatoes married beautiful in an unctuous aioli punctuated by the sharpness of good Dijon and pungent garlic. Yukon Golds are probably my favorite potato variety similar to red or new potatoes but with a wonderful buttery taste and a creamy texture. They are excellent mashing potatoes for that reason because you don't need to add nearly as much butter as usual and just a tiny bit of cream or half and half coaxes them into creamy whipped goodness. While sweet potatoes need no introduction this salad is just one more reason to love them any time of day.


Two things I always do when making potato salad: Boil the potatoes in their skins and dress them while they're warm. If you're the type that thinks ahead you will quickly realize this involves peeling and dicing boiling hot potatoes. I use a potholder and a combination of a peeler and butter knife because the skin tends to peel off fairly easily of the hot potatoes. If you're going to skip one of these steps, go ahead and peel (but don't dice) your potatoes while they're raw. There will be much more of a flavor difference if you dress cold potatoes than if you boil peeled potatoes. Make sense? ;)

The recipe below makes a good amount of dressing; that's so you can add it in dollops to the potato salad to get it as creamy as you would like and save the rest to slather on boiled asparagus, hard-boiled eggs, and artichokes. 

One Potato, Two Potato Salad

  • 2 lbs. Yukon Gold potatoes (I used 5 medium sized Yukon Gold potatoes)
  • 2 lbs. sweet potatoes (I used two large sweet potatoes)
 Garlic-Dijon Aioli (adapted from Creamy Garlic Vinaigrette, New Best Recipe)
  • 1/2 cup extra-virgin olive oil
  • 1/4 cup mayonnaise
  • 2 tablespoons white wine vinegar
  • 2 tablespoons lemon juice
  • 1 heaping tablespoon Dijon mustard
  • 2 small garlic cloves, minced
  • 1/2 teaspoon salt
  • pepper to taste
1. If the sweet potatoes are very large, cut them in halves or quarters so that they are roughly the same size as the Yukon Golds. Place the potatoes in a large pot with water to cover. Cover the pot and bring to a boil over high heat. Reduce the heat to medium and boil the potatoes until they are just cooked through, 15 to 20 minutes.
2. While the potatoes are cooking, whisk together the ingredients for the aioli. I made the aioli in my nearly-empty Dijon mustard jar, which allowed me to just shake to my heart's content until combined. You're done when everything emulsifies and is one luscious mass with a much thinner consistency than mayonnaise, similar to natural yogurt. A food processor or hand blender is also great for this task.

3. Drain the potatoes and immediately peel and dice them, transferring them to a large bowl as you go and covering the potatoes with a dish towel as you go to keep them warm. I find it makes a huge difference to dress the potatoes while they're still warm, especially since we boiled them in their jackets and so they are completely unseasoned at this point.

Holding the potatoes in a potholder in order to peel while warm.


Ready to dice!

This is how I dice, cutting the potatoes first into lengthwise planks, lengthwise again 90 degrees into french fries, then finally crosswise into dice.

4. Toss the diced potatoes gently with the aioli to taste. Start with 1/4 cup and if you like your dressing a little creamier add a bit more dressing 1 tablespoon at a time.

This is just as easily at home besides a roast chicken for dinner as it is all by itself for a light lunch or even breakfast.

Thursday, March 7, 2013

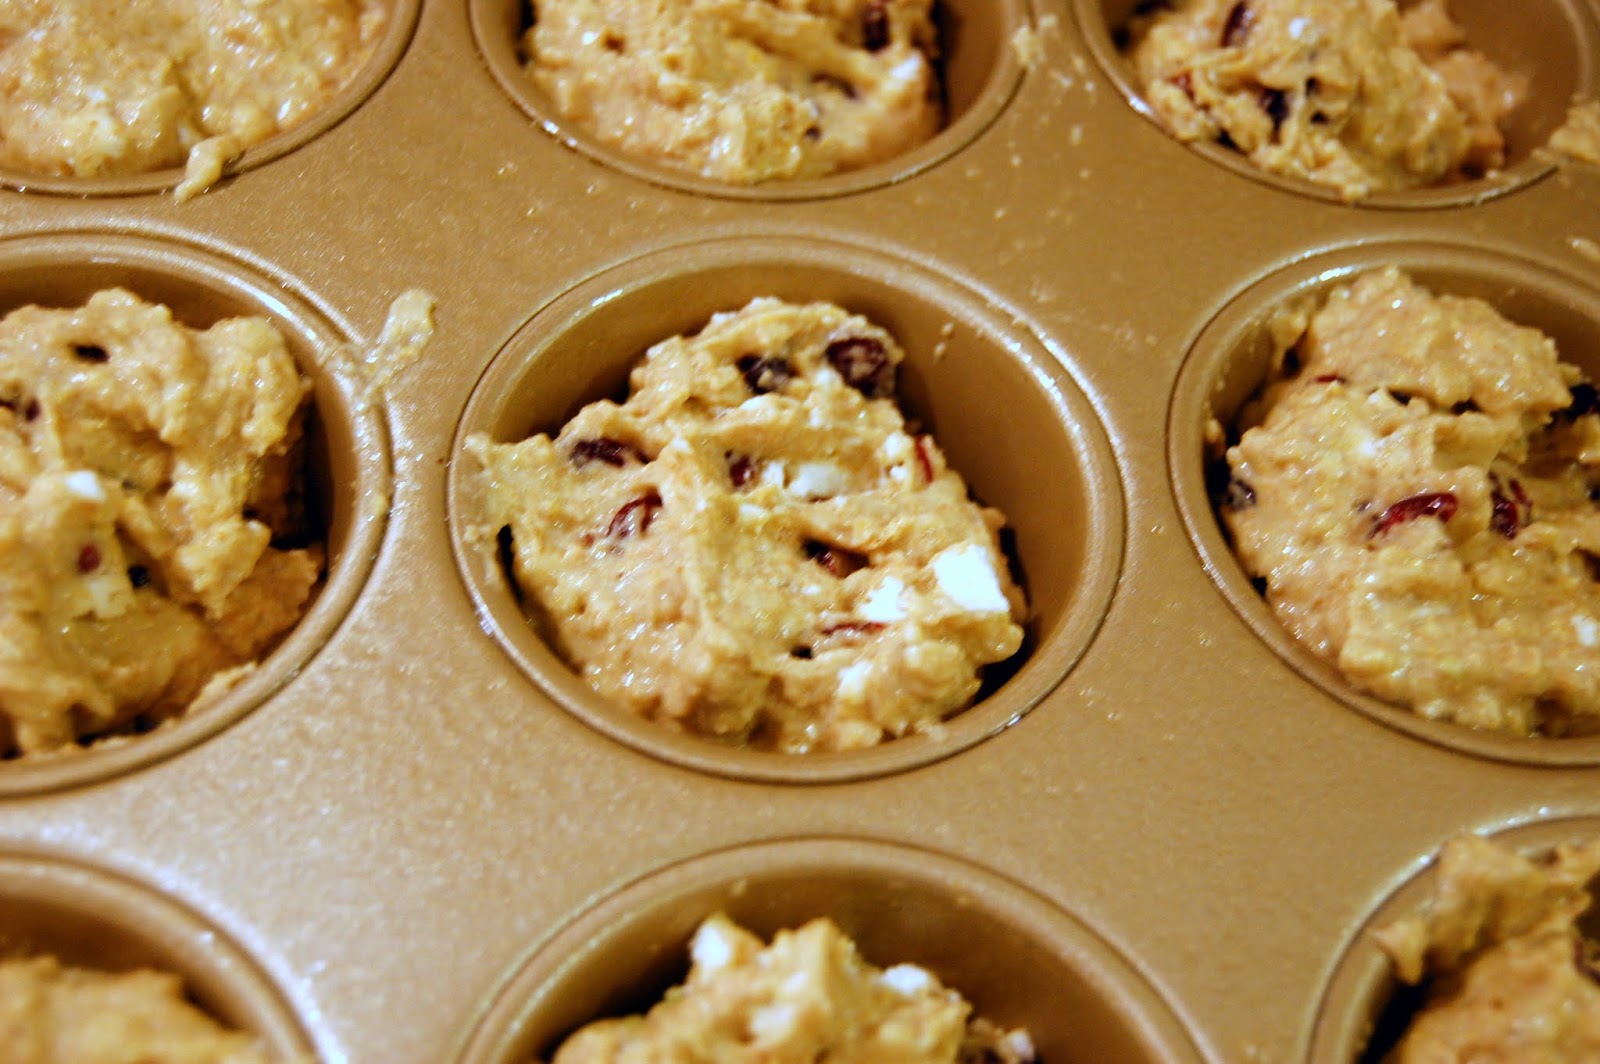
Whole Grain Corn Muffins with Goat Cheese and Cranberries

I debated whether or not to advertise this cornbread as vegan, because it totally is, except for the goat cheese. Story of my life.


Fun fact: did you know you can use a really ripe avocado instead of eggs or oil in your baked goods? Works wonders. Think about it: it's a little unctuous ball of butter and eggs all in one. I think the fat in the avocado is the reason they work much better than mashed bananas or applesauce as an egg replacer. You get fat and moisture without sweetness, giving you a lot of flexibility in your choice of baked goods. You want to use really, really ripe avocados when you do this, ones that are past the guacamole stage. The ones they sell two for a dollar in the produce clearance aisle? Those are perfect.


Honey? And avocado? That sounds weird. But hey, we're making vegan cornbread with avocado here (and goat cheese and cranberries) so we're putting weird on the back burner for the moment.

Savory.
Sweet.
Scoop.
Bake.
I used my immersion blender (definitely another favorite piece of kitchen equipment) to whip up the avocado, honey and soymilk right in the bowl. If you don't have an immersion blender, or your avocado isn't really, really ripe you might want to mash up your avocado in a separate bowl and then beat in your honey and soymilk.

Truth be told these vegan/not vegan corn muffins don't know exactly what they want to be. They are just as delicious for breakfast as they are with dinner (we ate them with sweet potato soup) or for an afternoon snack. Goat cheese and cranberries is really a no-brainer, it's got the sweet/salty, chewy/creamy contrast going on. Both are a lovely surprise studded throughout the cornbread, whose texture is decidedly un-vegan. I make cornbread at least weekly and I was surprised at how little I could tell a difference between this cornbread and my standard favorite recipe, which calls for 1/2 cup of butter and 2 eggs (totally not a Southern recipe, I've converted...).


It doesn't really matter what these muffins want to be; anything studded with chunks of melted goat cheese can't be anything other than delicious.

Whole Grain Corn Muffins with Goat Cheese and Cranberries

  • 1 cup yellow cornmeal
  • 1 cup whole-wheat flour
  • 1 teaspoon baking powder
  • 1 teaspoon baking soda
  • 1/2 teaspoon salt
  • 2 tablespoons honey
  • 1/2 ripe avocado
  • 1 3/4 cups soymilk
  • 1/2 cup crumbled goat cheese
  • 1/2 cup dried cranberries
  1. Preheat oven to 375 degrees. Grease a 12-cup muffin tin.
  2. Thoroughly combine your dry ingredients in a large mixing bowl.
  3. In a separate bowl, mash up your avocado and beat in the soymilk and honey, mixing well.
  4. Make a well in the center of the dry ingredients and stir the wet and dry together with a wooden spoon or mixing spoon until just combined. Gently stir in the goat cheese and cranberries.
  5. Scoop into prepared muffin tin and bake for 15 to 20 minutes, until muffins are well risen and lightly browned on top.

Friday, December 21, 2012

Spiced Cranberry Eggnog Scones

Cubed butter on baking counter
Saturday mornings are meant for baking, especially if you're the type who naturally wakes up an hour before everyone else. I have always been 100% a morning person; once my eyes pop open there's nothing for it, I'm not going back to sleep. It's always worked out particularly well; everyone's usually waking up right when the baked goods come out of the oven.

Such can be the case with these pretty darn delicious Cranberry Eggnog Scones.  Don't know how you get much more Christmas-y than that. These could easily be prepped the night before Christmas morning as well; I would meaure all your dry ingredients into a bowl and cut the butter in, then cover that and wait to add the wet ingredients the following morning. It actually might turn out better scones because the extra-cold butter and flour will make for extra-light and fluffy scones once the butter hits the oven (the steam is what makes biscuits and scones fluffy and almost moist on the inside!)


I made these in the food processor, which is a great way to make scones, but if you have a little baby guy like mine it would be best to just make these by hands.  When you add the wet ingredients you only want to pulse for 2 or 3 pulses and my little guy was just too small to mix all the ingredients in such a short amount of time.  I actually inherited this 20-year old food processor that my mom used to make homemade pizza dough when we went home for Thanksgiving and I. love. it.  It makes Sunday cooking day a breeze and saves my eyes from watering while I'm chopping onions.

But back to these scones: They are moist and fluffy and wonderful, even with my over-processing, thanks to the low protein in the cake flour. I would definitely make these again, in the mixer or by hand, and they would turn out even better. These scones definitely call for jam; the fresh cranberries are wonderfully tart and the scones themselves barely sweet. Enjoy!

Spiced Cranberry Eggnog Scones 
adapted from The Complete Baking Cookbook by George Geary

  • 1 1/2 cups all-purpose flour
  • 1 1/2 cups cake flour
  • 3 T granulated sugar
  • 1 T baking powder
  • 1 tsp. salt
  • 1 tsp. cinnamon
  • 1/2 tsp. nutmeg
  • 6 T. cold unsalted butter, cut into small dice
  • 2 eggs, beaten, divided
  • 3/4 cup eggnog
  • 1/2 cup fresh or frozen cranberries (do not thaw first if frozen)
  1. Preheat oven to 425.
  2. In a large bowl, combine the dry ingredients, mixing well.
    1. If mixing in a food processor, add the dry ingredients to the bowl and pulse several times to combine.
  3. Cut in the butter with a fork, a pastry blender, or your hands (if mixing by hand I usually stick the dry ingredients in the freezer for 5 minutes or so after cutting in the fat to make up for the warmth of my hands)
    1. If using a food processor, scatter the butter pieces evenly over the flour and pulse several times to combine. You don't want to pulse too much or the butter pieces will be too fine and your scones will not be as tender.
  4. Set aside 1 T. of beaten egg (you can just put it in a 1/4 cup measuring cup or something until you're ready.) Whisk together the remaining egg and eggnog and add to the dry ingredients, stirring until almost combined (you will finish combining them in the next step and you don't want to overmix). 
    1. If mixing in the food processor, beat the wet ingredients together in a small bowl and pour down the food processor chute, pulsing once or twice to combine.  Transfer to a large bowl and continue.
  5. Add the cranberries, stirring just to combine.
  6. The scones you see in the picture I made as drop scones: I just scooped the dough out with a muffin scoop and flattened the top slightly.  If you prefer, you can pat the dough into a 10-inch circle, place on your baking sheet and cut into 12 wedges with a bench scraper or pizza cutter (do not separate the wedges after cutting.) Brush with the remaining beaten egg, using a pastry brush if you have it or a fork if you don't.  Sprinkle with some raw sugar if you have it for beauty and crunch. 
Shaped scones brushed with beaten egg (would be great sprinkled with a little turbinado sugar!)

7. Bake in the preheated oven until puffed, light brown and gorgeous, 18 to 22 minutes.  Serve warm with eggnog coffee (have you ever used eggnog as coffee creamer? It's a good idea).
  
Fresh out of the oven.

Merry Christmas, Everyone!

Friday, September 28, 2012

Warm Butternut Squash and Rice Salad with Brussels Sprouts, Apples and Dijon Vinaigrette


I just Googled the name to make sure it is indeed "Brussels" as in the city and not "Brussel" sprouts. Conveniently, there is a www.brussels-sprouts.com, which informed me that "the modern Brussels sprout that we are familiar with was first cultivated in large quantities in Belgium." I like to know these things. Etymology aside, if you love Brussels sprouts like I do you will love them in this dish; if not feel free to leave them out, the butternut squash is the real heavy-lifter here.


I wasn't originally planning on putting this on the blog but it turned out so darn delicious I had to share it with you. I used instant brown rice which I think is truly one of the greatest inventions since sliced bread and just as convenient, making this doable for a weeknight dinner. In the background there is the dressing, a simple apple cider and Dijon vinaigrette which would be equally delicious brushed on grilled pork or grilled chicken.  You could also use cubed sweet potatoes if you don't want to fool with peeling the butternut squash.  I used a McIntosh apple because that's we had but I think this would work better with good ol' Granny Smith, which holds its shape when baked/roasted/grilled/sauteed much better than a McIntosh.  This would also be delicious with toasted walnuts and cranberries for Thanksgiving.  I told you I'm not really into recipes, right? It's your food-have fun with it!

Warm Butternut Squash and Rice Salad with Brussels Sprouts, Apples, and Dijon Vinaigrette


  • 1 butternut squash, peeled and cubed
  • 1 small apple, cubed
  • 1 medium onion, diced
  • 1 cup frozen Brussels sprouts
  • Salt and pepper (about 1/2 and 1/4 of a teaspoon, respectively, if you like to measure!)
  • 2 cups chicken broth, homemade if you have it and low sodium if you don't.
  • 1 cup instant brown rice
For the Dijon Vinaigrette:
  • 2 tablespoons apple cider vinegar
  • 1 tablespoon Dijon mustard
  • 1 tablespoon olive oil
  • Dash of salt and dash of pepper
  1. Heat 1-2 tablespoons oil in a large skillet over medium heat until oil shimmers but does not smoke. Add onions and cook for 1-2 minutes, until just starting to turn translucent.  Add butternut squash, stir to combine, and cover the skillet.  Cook for 5-10 minutes, until the squash is just starting to get tender.  Life the cover, stir everything around, add the frozen Brussels sprouts, and cover again. Cook for an additional 5 minutes or so, until the Brussels sprouts are heated through and the squash is almost tender. You don't want to cook anything all the way through because this is a one-pot dish and you'll be cooking the pot right in the pan with the squash, so it will finish cooking along with the rice.
  2. Add 2 cups chicken broth to the skillet and bring to a simmer. Add the 1 cup brown rice, cover, and simmer for 10 minutes, until broth is absorbed and rice is cooked through.
  3. Meanwhile, prepare the vinaigrette: whisk together all ingredients in a small bowl or small measuring cup. Whisk well to emulsify.
  4. As soon as the rice is done cooking, while it is still cooking, add half the vinaigrette and toss. Taste the dressing at this point: my husband prefers things rather plain (*cough*bland*cough*), so I only used half the dressing in the finished dish and added additional dressing at the table. If you can't have too much flavor, like me, you may want to add the other half of the dressing. If not save it in the fridge, it's a great all-purpose vinaigrette.
What about you? Are you a Brussels sprouts lover or hater?Any foods you love that people tend not to like? Brussels sprouts is definitely on my list there, along with Rye bread, sardines, whole-grain mustard, and I'll stop there because I just made myself a nice little sandwich :) What's on your list?

Monday, September 3, 2012

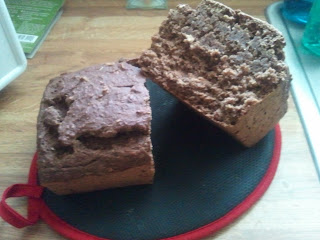
Multigrain Chocolate Stout Banana Bread

Chocolate Stout Banana Bread

Simplicity is not my strong point, at least when it comes to food. In life I am perfectly content to wear the same long waisted t-shirt and comfy flats high school through college, no problem. When it comes to my eating habits, however, I am infamous for 1) eating every meal out of a bowl 2) putting more ingredients than really necessary in said bowls. For instance, my morning oatmeal bowl often consists of oatmeal (3 parts steel cut to 1 part old-fashioned--try it, the texture is unlike any other) topped with sliced banana, nuts or peanut butter, yogurt, and granola. If you do 1/2 servings of each component you end up with one well-rounded bowl of lovely texture and temperature contrasts, the key to memorable dishes.

Which brings us to today's creation. It all started with a bottle of opened stout in the fridge. I opened it the other night for dessert and apparently misread my cravings because it was too heavy for me that late at night. I think I had a glass of wine instead. I'm all about freedom of choice. But back to the beer--flat, opened beer in the fridge screams "beer bread" to me. Did y'all make beer bread in college? We made a lot of it. Want to know why? Here's the recipe, pay attention now: measure 3 cups of self rising flour and 1/2 cup of sugar into a bowl (or directly into a greased baking pan, if you really want to go dorm-style). Stir in 1 12-ounce bottle or can of beer. Bake at 350 for 1 hour. Really, that's it. Sometime we would get creative and do garlic parmesan or cinnamon sugar toppings, but in general that's it. It has a texture like the middle of a good biscuits-and-gravy biscuit: dense and bready, perfect for slathering with butter and honey. Bringing back memories.

So today's beer bread started with that basic premise. The chocolate stout in the title refers not to "chocolate stout" as in Young's Double Chocolate or similar, but rather to chocolate, as in a fantastic high-fat natural cocoa powder I got from Penzey's this weekend, and stout, the beer on the same end of the spectrum as porters. Chocolate stout beer bread? I could tell this bread was headed somewhere delicious. There was also quite an old banana sitting in the fridge that I'd been meaning to mush up in a bowl of oatmeal for a few mornings now. I realize not everyone is a fan of the banana + chocolate combination, but I certainly am and a banana always adds some welcome moisture if you're a fan of the flavor. Oatmeal! That's a good idea too.  Then a hint of cinnamon for a welcome backbone of warmth and a star is born.


I truly wish you were here to share this with me. This honestly turned out so much better than I thought it would, the darkness of the stout and coffee brought out wonderfully by the cocoa and the cinnamon. It made for a deeply satisfying snack with a little fig-orange-ginger jam on top and a mug of coffee on the side. I told you simplicity is not my strong point. Oh and also? This loaf just happens to be vegan. Snuck that one in on you, huh? That's right, no eggs, milk, or butter to be found, just good ol' beer, coffee and chocolate. If you like barely sweet and highly flavorful baked goods, this loaf's for you. 

Multigrain Chocolate Stout Banana Bread

Preheat your oven to 350 degrees and grease a 9x5 inch loaf pan.

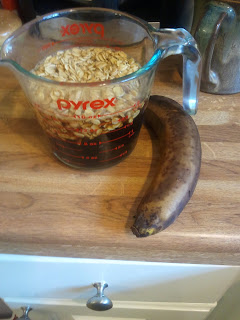
1.  Measure out 1 cup any stout beer (such as Guinness) and 1/2 cup strong black coffee into a measuring cup.  Add 1/2 cup old-fashioned rolled oats and let stand at room temperature while you prepare the rest of the ingredients.
Oatmeal Stout Banana


2. Measure 2 cups whole wheat pastry flour (you could certainly use all-purpose; whole wheat behaves much the same way most of the time, it would work fine in this recipe), 1/2 cup whole wheat flour, 1/3 cup natural cocoa, 1/4 cup cocoa, 1 tablespoon baking soda, 1 tsp. salt and 1 tsp. cinnamon into a medium mixing bowl and mix well with a fork or wire whisk to combine.

Flour cocoa baking powder salt sugar

3. In a separate bowl, mash one ripe banana using a fork or pastry blender. Whisk in 3 tablespoons vegetable oil.

4. Add the measuring cup of beer + coffee + oatmeal to the banana and stir to combine. Add the wet ingredients to the dry ingredients and stir just to combine.
5. Pour your batter into the prepared loaf pan. Bake at 350 degrees for 45-60 minutes, until a toothpick inserted in the very center comes out with one or two moist crumbs attached. This is a very dense bread and so will not be actually wet and batter-like in the center. If you're baking in a metal baking dish, the bread will probably take closer to 45 minutes and if you are baking in a glass Pyrex dish or similar it will probably take closer to 60 minutes.

6. Turn out onto a wire rack to cool for at least 15 minutes (slicing into it hot will ultimately dry out the loaf!). Slather with your condiment of choice and enjoy with an afternoon cup of coffee. Or, of course, another beer.

Saturday, August 25, 2012

Mediterranean Barley-Stuffed Peppers

I tried meal planning this week. In my house growing up there were about 10 different dinner options, including three different "casseroles" that start with a box of mac' and cheese. Every day about 5:00 pm, my dad or my mom or my sis, whomever happened to be home, would say "what do you want for dinner?" and on we went. My husband, however, grew up with the week's meal plan taped to the fridge, something I thought went out of fashion the same time as the "no white after labor day" rule. In the spirit of compromise, I tried it last week and it turns out I love it.

I had to get used to shopping with a list. When I shopped just for myself I would go shopping on Sunday afternoons when they make all the markdowns, buy whatever was on clearance, and that's what I'd eat for the week. Yes, I'm that crazy lady at the grocery store with a cart full of markdowns simultaneously trying to rifle through her coupons and steer her cart at the same time.  I also ate more meat last week than I have in the last month. I have that old American mindset that it doesn't look like a "real" meal without a hunk of meat on the plate. Weird, because on my own I rarely eat meat. Last night Jim was working late and my dinner was two pieces of toasted Italian bread with hummus and bruschetta and a glass of wine. So simple and so satisfying.

In that spirit, I've toned down our meat for the upcoming week in an effort to cut costs and get back to my veggie-loving roots. Here's a lovely recipe that reflects that, Mediterranean Barley-Stuffed Peppers. They would be delicious with some herbed goat cheese, good bread and a salad. Actually everything would be delicious with herbed goat cheese, good bread and a salad. But we're here to talk about the peppers.

Mediterranean Barley-Stuffed Peppers


 1. Wash two bell peppers (I used one green and one red) and cut in half through the stem from top to bottom. Empty out the seeds and ribs inside. I like to cut off one small slivery from the back of the pepper half so that it will lie flatly on my baking sheet.  Set these aside while you prepare the filling.
(That bowl on the left is some bread cubes for a panzanella salad to go with!)

2. Chop one onion and get that started sauteing in a skillet over medium heat. Cut two zucchini into medium chunks (they're the only thing with any texture in the finished dish). Add to the onion in the pan and stir everything around. I used a nonstick pan so I actually did not use any oil at all, but feel free to use a tablespoon of olive oil if you're not using nonstick. Add some salt (1/2 tsp) at this point for seasoning. I think it's important to season + taste at every level of a dish so the finished dish is well-balanced and well-seasoned. I also added a splash of red wine at this point, cuz that never hurts. It just adds a little depth of flavor. I would add a tablespoon of balsamic vinegar if you don't use the wine.

3. I usually have a big bowl of cooked whole grains in the fridge. This week it was barley. I get pearled barley from the story because it's so cheap! Once your onions are translucent add 1 1/2 cups of cooked barley. If you need to cook the barley from scratch, bring one can of reduced-sodium chicken broth (or 1 3/4 cups of water or homemade chicken broth if you'd prefer) to a simmer and add 1 1/4 cups of barley and simmer for 40 minutes, until the liquid is absorbed.


Yup. That's how I add the barley. What can I say? I like to cook with my hands.

4. I had half a jar of spaghetti sauce in the fridge, so I added that. If I hadn't had the spaghetti sauce in the fridge I would have opened up a can of tomato sauce (8 oz) and used that.

At this point, the mixture tasted much better than I expected, but I added about 1/2 tsp. each of dried basil and dried oregano for a little freshness.

5. Fill the peppers! I took a little spoon so I could pack as much filling as possible in there.

5. I baked these guys at 400 degrees for 35 minutes, until set, browned, and bubbly.


Let me know how yours turns out!


Sunday, August 12, 2012

Rustic Bruleed Oatmeal with Caramelized Bananas

Life doesn't always go as planned, nor is it always perfect. I'm just a font of wisdom this morning, eh?  I mention it because the last week of my life has been absolutely perfect. I didn't have to worry about a thing the day of my wedding. I only pulled my bridal diva card once, when my sister and maid of honor couldn't find a Starbucks for my latte and so got me a Dunkin Donuts latte. Don't worry, the other bridesmaids pitched in and soon got me my grande soy latte. Funny, it makes me sound like a Starbucks person, which I'm not particularly. I'm priviliged to live in an area with an abundance of quality independent coffee shops but I wasn't about to send my bridesmaids 20 minutes to the next town over for a soy latte, although I considered it.

My wedding day was perfect.  It was followed by a week of this:


It's really hard to miss the lack of internet access at times like these. 

Suffice it to say that this week of perfection has served like a camera flash to obscure the other details of my life. As my eyes readjust to the light of normal life all the little things are slowly coming to light. For now, though, I'll relive one perfect morning with you.


Make this oatmeal the next time you're in a cabin with no internet access and an unobscured view of the mountains outside your bathroom window, for heaven's sake. Or make it for yourself and your loved ones in your pajamas as soon as the weather turns chilly.

Bruleed Steel Cut Oats with Caramelized Bananas


  • 1 cup steel cut oats
  • 3 cups water
  • Pinch of salt
  • 1 cup dairy (I used hazelnut half and half, which was delicious, and milk)
  • Sugar for bruleeing (turbinado would have been ideal but I only had granulated. Use turbinado if you have it, the textures will be great.)
  • 1 banana, cut into thick diagonal slices
  • 1 tablespoon butter
  • 1 tablespoon sugar
  1. Preheat your oven broiler. Move your oven rack to the topmost position where your baking dish can still fit under the broiler element.
  2. Bring the oats and water to a boil in a 3 quart saucepan. Turn the heat to low so that the oats are just barely simmering and simmer for 20-30 minutes, depending on how "al dente" you want your oats.  Start tasting after 20 minutes. Stir in the dairy and bring back to a simmer.
  3. Transfer the oats to a cast iron pan or other oven-safe pan.  Broil for 8-10 minutes, checking often so that the sugar does not burn.
  4. While the oatmeal is broiling, melt the butter and sugar together in a small (8 or 10 inch) skillet over medium heat.  Lay your banana slices in a flat layer in the skillet and do not disturb for 3-4 minutes so that they get a lovely golden brown color.  Flip the bananas and continue cooking.  
  5. Serve your oatmeal with the bananas, some warmed milk or cream, and whatever fruit you have on hand.

Sunday, July 29, 2012

Anti-Anxiety Whole Wheat Trail Mix Scones


I'm getting married on Saturday.  Hopefully that explains my post title a bit. I've been swept up lately in the fun of party planning and bridal showers and excitement. This particular morning, though, it all came crashing down on my pre-coffee brain: oh my goodness, I don't have a dress for the after party!  What will my parents do while I'm at my bachelorette party? Where will my sister's dog sleep?  Oh my gosh, I have totally lost my veil.  Oh, no, wait there it is. (This has, unfortunately, crossed my anxiety-ridden pre-wedding brain with practically every essential item of my wedding wardrobe.) And then, breakfast. I was hungry, one cup of coffee down, one real meal to go. Usually on a lazy Saturday or Sunday, the answer is simple: I make muffins.

Yet this Sunday, there I was, facing a bowl full of 2 cups of flour per recipe possibility #1 and Googling yet another permutation of "whole wheat muffin recipe" in the hopes that just one of them would yield muffins I could make from ingredients at my new house, where my fiance currently lives, without running back to my old house, where I currently live, at which point I may as well just go to the store. That's when it hit me: this is not fun today. I only cook when it's fun. My tummy is a demanding little thing in the mornings, though, and cereal and milk just won't cut it. Scones were the answer.

2 cups flour? Sure that'll work. Oatmeal for texture. Baking powder, no baking soda necessary (good thing, too, because the only box in the house is currently busy deodorizing the fridge and is therefore forbidden from having anything to do with my scones). Butter, 1 stick. Milk. I would have liked buttermilk but whatchagonnado. Trail mix because I didn't have raisins. Eggs. And you know what? 20 minutes later, there they were. My scones. Eaten somewhat ravenously slathered with butter and jam and black coffee for company's sake.  Barely sweet, wonderfully crunchy.


This time next week I will be married. My dress will be packed, my hair washed, my friends on their way home. And I will be married.

I think I need another scone.

Butter + jam? Always.


Anti-Anxiety Whole Wheat Trail Mix Scones
  • 2 1/2 cups whole wheat pastry flour
  • 1/2 cup old-fashioned oatmeal
  • 1/3 cup white sugar
  • 1 tablespoon baking powder
  • 1/2 teaspoon salt
  • 1/2 cup trail mix, a natural nuts-and-seeds variety, or any combination of dried fruits and nuts to total 1/2 cup.
  • 1/2 cup (1 stick) butter, unsalted, cold and cubed (keep this in the fridge until just before you make the scones)
  • 1/2 cup dairy (I used lactose-free milk because that's what was in the fridge, but ideally I would have liked buttermilk, sour cream, or plain yogurt, in that order)
  • 2 eggs, lightly beaten
  1. Preheat the oven to 450 degrees.
  2. Mix together the dry ingredients with a fork or whisk.
  3. Cut your butter lengthwise into four long pieces, like a checkerboard cookie, then cut off the butter in "pats" so you have little butter cubes. Try not to handle the butter too much as you want it to melt as little as possible before scone meets oven.  
  4. I cut my butter into the flour with my hands (this is part of the stress relief), but a fork or pastry blender works great here (I never could get the two knives thing down).
  5. Make a little well in the middle of your dry ingredients and add the eggs and milk into the well.  Stir briskly with a fork until a soft dough forms. Try to stir up from the bottom of the bowl as you work so you can incorporate all the bits of flour from the bottom of the bowl.
  6. Dump directly onto a cookie sheet or jelly roll pan (I used the Goldtouch nonstick sheet from Williams-Sonoma, which did a beautiful job of browning). Knead only enough to gather the dough together and pat into a round 8 inches around and 1 1/2 inches high. Score the dough into 8 wedges using a sharp chef's knife or bench scraper by cutting almost, but not quite, all the way through the dough.
  7. Bake for 8 minutes.  Turn the oven off and leave the scones in the oven for another 10 minutes.

Saturday, July 28, 2012

Sweet Potato, Black Bean and Kale Enchilada Pie

"Tell me what you eat and I'll tell you who you are."
~A. Brillat-Savarin

I find recipes terribly difficult to follow.  1/2 teaspoon of vanilla? That's silly, I need at least a tablespoon. It calls for applesauce? I'm sure bananas will work just fine (I am never out of bananas). While I call this habit quirky and charming and a mark of my superior chef-liness, this quality tends to drive my fiance and anyone else sharing a kitchen with me slightly bonkers. The truth is that my riff on recipes turn out quite tasty 98% of the time (the other 2% I'm usually talking to my sister on the phone).

Following a recipe is a bit like learning to drive: even the best teacher's instructions give only a conceptual grasp of the topic. At some point, learning to drive and making your mother's famous pecan pie both take a certain leap of faith.  Those two seconds of uncertainty that bridge the gap between knowledge and instinct creates true mastery; suddenly you are no longer making your mother's pecan pie, but your enchilada pie.  No, it won't taste exactly the same and that's the beauty of it.

The poetry of recipes lies in their reflection of their creator. Even the most dutifully tested recipes cannot convey exactly how many turns around the bowl the chef took to fold in the egg whites and very few bother to mention whether she cleaned every stitch of batter out of the bowl with her scraper or left a few scrapes in for snacking. Have you ever notice how many pictorial recipes exist for making biscuits?  That substantial-yet-melt-in-your-mouth quality of the quintessential Southern biscuit seems to be a dying skill right up their with caning chair backs (which has nothing to do with beating them) and writing thank-you notes. That particular feather in my culinary cap still manages to elude me and is one of the tasks I plan to conquer on this blog with the help of my readers and my beloved copy of The New Best Recipe, right along with angel food cake and the perfectly delicious Saturday morning whole grain muffin.

For now, though, this simple weeknight meal will suffice. I made it one evening when I was feeling particularly frugal (ok, my fiance was being the frugal one, I was craving my favorite repast at our neighborhood watering hole: chicken nachos and the beer of the moment). The recipe as follows is the way I actually made it that night; next time I think I'll add some enchilada sauce and a few more veggies and I'm sure this would be even tastier with fresh sweet potato roasted to optimal mushy yumminess. The kale plays surprisingly well against the sweet potato and adds an extra flavor element which rounds out the pie beautifully. Let me know how yours turns out in the comments section below.  It is, after all, your recipe.

Sweet Potato, Black bean, and Kale Enchilada Pie

  • 1 can (29 oz) sweet potatoes, rinsed to remove extra syrup and mashed
  • 6 whole grain flour tortillas
  • 1 can (15 oz.) black beans, drained and rinsed
  • 3 cups kale, rinsed and chopped
  • 1 onion, sliced and sauteed until translucent
  • 1 15-oz jar medium salsa
  • 1 cup grated cheddar or colby jack (Cotija would also be lovely!)
  1. Preheat the oven to 350. 
  2. Place one tortilla in the bottom of a deep-dish 10 inch pie pan. Cover with a thin even layer of mashed sweet potato. Top with 1/3 of the cooked onion, 1/3 of the can of black beans, 1 cup of kale, and 1/3 of the salsa, in that order. (You can add some cheese if you like but I usually save mine for the top)
  3. Cover the ingredients with another layer of tortillas, tearing them as necessary to fill the pan to the edges. Repeat the layering of ingredients twice more until all ingredients are used and the pie pan is filled to the top.  Cover generously with cheese.
  4. Bake for 20-30 minutes or until the cheese on top is your desired level of browned, burnt, and bubbly (I like my steak medium rare but my cheese well done).
*Note: this recipe can easily be made vegan by using soy cheese and vegan tortillas.